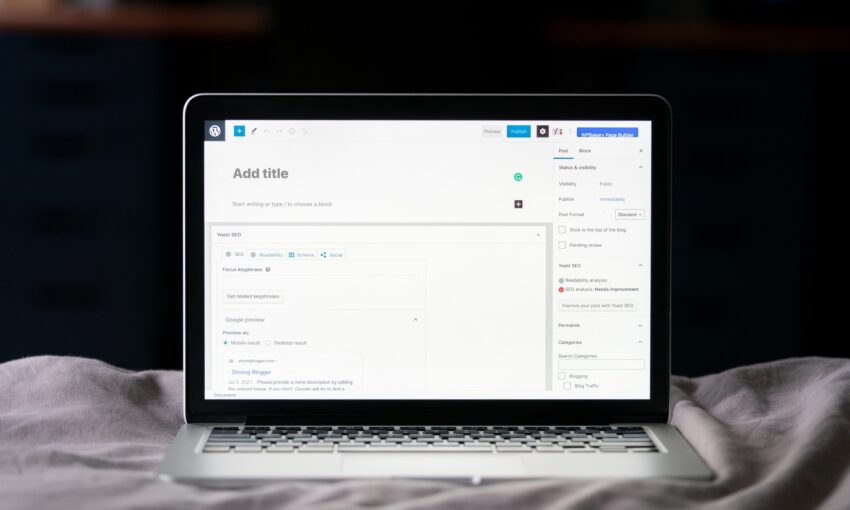
When the Gutenberg block editor was released as part of WordPress 5.0, it launched a new era of content creation. No longer would seemingly-simple tasks like creating multi-column layouts or adding embedded media require a page builder plugin or custom code.
Gutenberg breaks content down into “blocks”, or little sections that can be rearranged with ease. By default, WordPress comes with a nice selection of blocks. But it also allows developers to build their own custom blocks as well.
Custom Gutenberg blocks can be a game-changer for theme developers. Rather than relying on workarounds or rigid page templates, a custom block can place specialized content anywhere within a page. Elements such as testimonials, accordion menus and pricing tables are just a few examples of what can be achieved.
As great as custom Gutenberg blocks sound, there was some initial concern about the barrier to entry. Building blocks natively requires knowledge of React, which could leave out a lot of developers.
Thankfully, the WordPress developer community has stepped up with tools that get around the React/JavaScript requirement. They allow you to create your own custom blocks in a visual manner and implement them into your existing WordPress theme.
Today, we’ll introduce you to a few of these tools and show you how easy it is to get started.
UNLIMITED DOWNLOADS: 500,000+ WordPress & Design Assets
Sign up for Envato Elements and get unlimited downloads starting at only $16.50 per month!

Custom Gutenberg Blocks: Tools
A number of tools have hit the market that allow web designers to create custom Gutenberg blocks without JavaScript. Mind you, they still require at least some knowledge of code (HTML, CSS and PHP) – or at least how a WordPress theme works. That’s because each option requires you to create a PHP file of block code and optionally add some styling to match your website.
That said, each of the WordPress plugins below leverages custom fields in order to create content. Custom fields existed well before Gutenberg came along. In fact, it’s long been common practice to utilize them as a way to get around the limitations of the old Classic Editor.
The nice thing about this sort of configuration is that custom fields offer flexibility in the types of content you can create. Mix that in with the portability of a Gutenberg block and you have a powerful new tool.
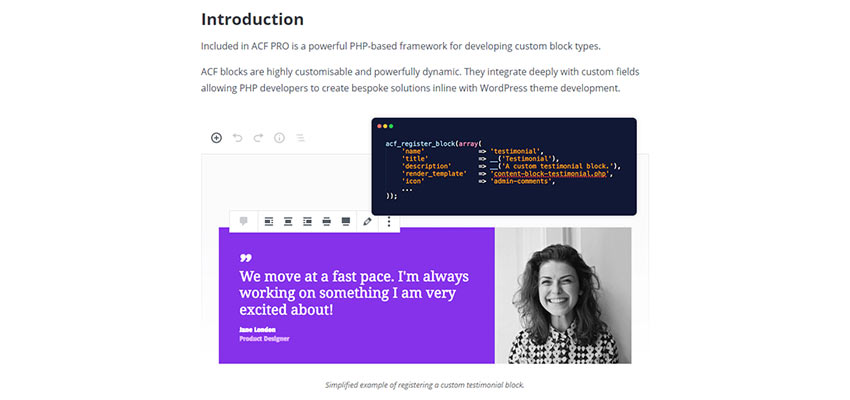
Advanced Custom Fields PRO
Advanced Custom Fields has been around for years. It started out as a handy UI for building complex custom field sets and now boasts over 1 million active users of its free version.
The commercially-available PRO version of the plugin (pricing starts at $49 per year) has evolved to allow for custom Gutenberg block creation. The ACF Blocks feature lets developers create a field set and assign it to a custom block.
More than the other plugins in this category, you’ll need to know PHP to get the most out of ACF Pro. However, existing users of the plugin will find the process for block creation very familiar.
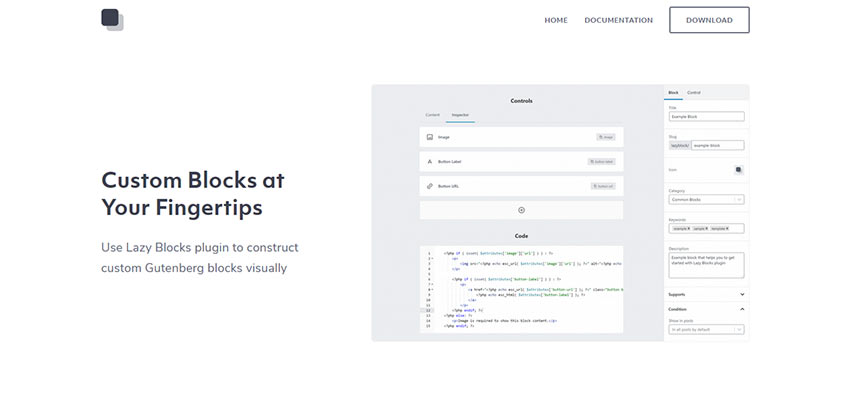
Lazy Blocks – Gutenberg Blocks Constructor
Lazy Blocks is a free WordPress plugin that offers a visual way to create custom blocks. Like ACF, the plugin includes a number of custom field types (referred to as “controls”) for your block. Text, image, file, Classic Editor, color picker and repeater fields are just some of what’s available. There’s also an API for creating your own custom controls.
Other handy features include the ability to restrict your blocks to specific posts types, import/export via JSON and custom templates.
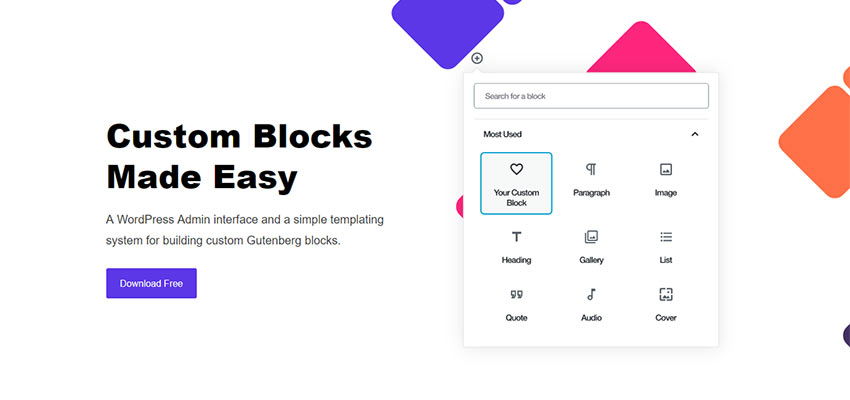
Block Lab
With Block Lab, custom block creation is a 3-step process. First is adding a block within the admin – which is similar to adding any other page or post. Next, add in the desired mix of custom fields (text, image, radio buttons/checkboxes, URLs, etc.) and configure settings like a custom icon. Third, create a block template for your theme and style it to your liking. From there, your custom block is ready for use.
The plugin is well-documented and even offers tutorials for creating specific block types.
A Simple Custom Block Using Block Lab
For simplicity’s sake, we’ll take a test drive using Block Lab. However, don’t let that stop you from trying out the other options as they have plenty to offer.
Now, on to our example. We’ll assume you have a WordPress website with the Block Lab plugin installed and activated.
In our project, we’ll create a simple notification block that we can use to display important information to visitors. It won’t be much, just a colored background and some text. But it will hopefully provide a glimpse into what’s possible with a custom Gutenberg block.
1. Navigate to Block Lab > Add New to create our new block.
2. We’ll start by adding a title (Notification Bar) and three fields:
- Background Color – A Color field that will let us choose the background for our notification bar. We’ll assign it to display in the Inspector area of the block editor, which is in the right sidebar.
- Text Color – Another Color field, this time for our text. This one will also display in the Inspector.
- Message – A Text field that will display our custom message. This field will be housed in the main Editor area of Gutenberg.
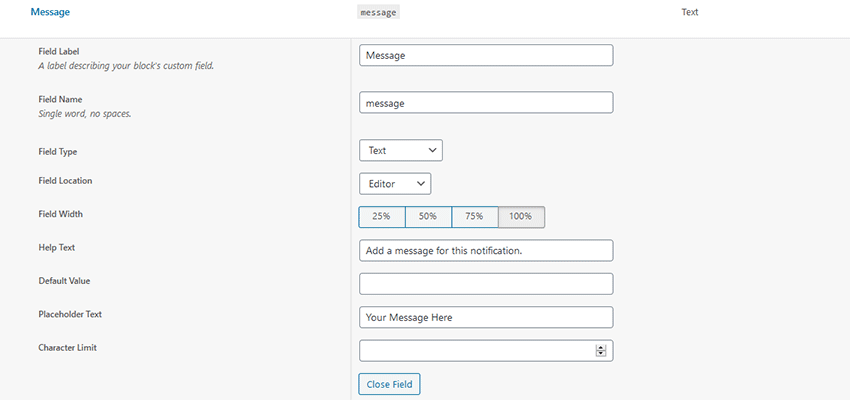
Note the field names assigned to each block, as we’ll need those in just a bit.
We should also mention that the plugin allows us to choose a custom icon and categorize our block. This will help us find it when we want to add it to a page.
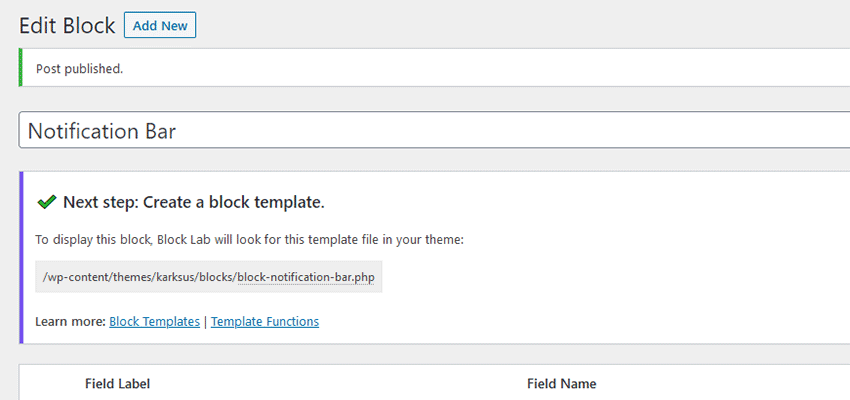
3. With our fields and settings in place, it’s time to click the Publish button to save our block. Doing so will trigger a notification message, telling us where to place our custom block template within our theme:
/wp-content/themes/YOURTHEME/blocks/block-notification-bar.php
4. Next, we’ll need to create a block template. So, fire up the code editor of your choice and create a new file called block-notification-bar.php and save it into a new /blocks/ folder within your theme.
Block templates have to be written from scratch. But don’t worry, it’s not too difficult! Block Lab has documented how to do this, with plenty of examples.
In our case, we have just two block types: Color (background-color; text-color) and Text (message). Using the documentation as our guide, we’ll add this code to our custom block template:
Make sure to save the file and upload to your web server when done.
5. Our custom block has now been created! That’s really all there is to it. Now, we can add it to a page.
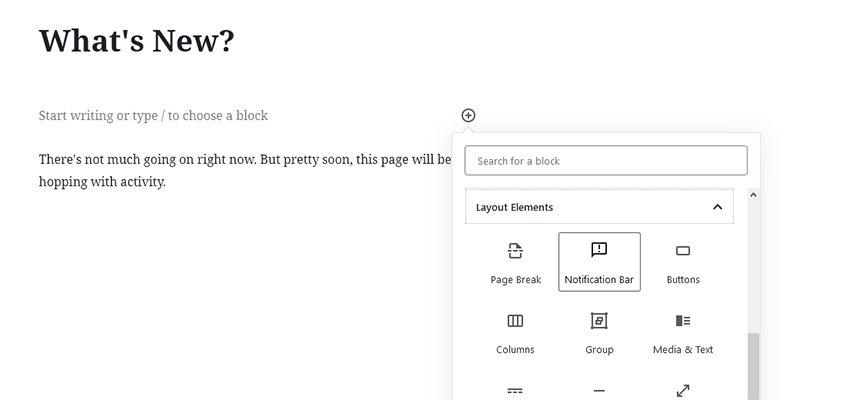
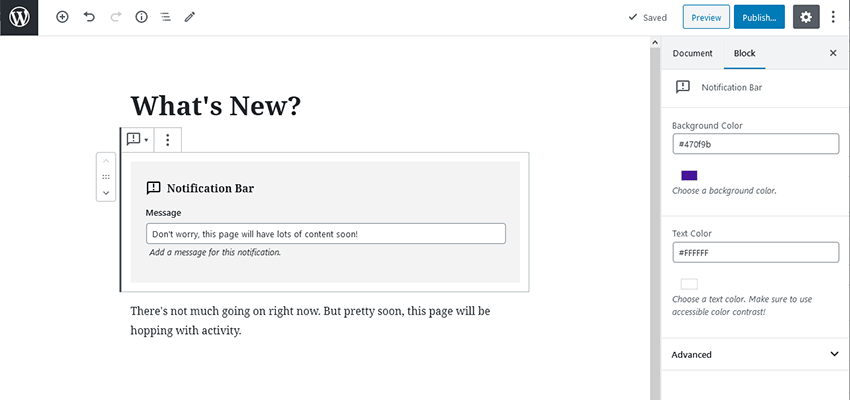
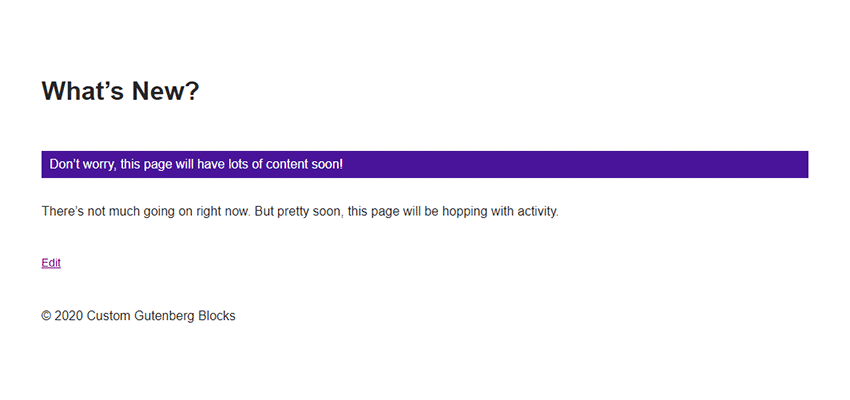
6. On the front end, we have a basic notification bar that’s sure to grab the user’s attention.
Going Further
Even in this very simple use case, there is a real value in the notification bar we’ve created. It can be placed on any page or post within our website and can be customized each time.
If we wanted to expand upon what we’ve built, there are plenty of options. Adding things like icons, buttons and the ability to link to another page or post come to mind. These things are all possible within Block Lab, as well as the other plugins mentioned above. And, the use of CSS can greatly enhance the look as well.
Now that you’ve had a taste of the custom block creation process, it’s time to experiment! Install one of the plugins above and see how you can enhance your WordPress website.
This post may contain affiliate links. See our disclosure about affiliate links here.