Have you decided to learn web design?
Congratulations! Web design can be one of the most useful skills to acquire in your professional career. Your first 30 days of learning are crucial because many people simply give up after a week or two. In this article, we’ll go through some useful tips and tricks to help you get started with web design and stay on track.
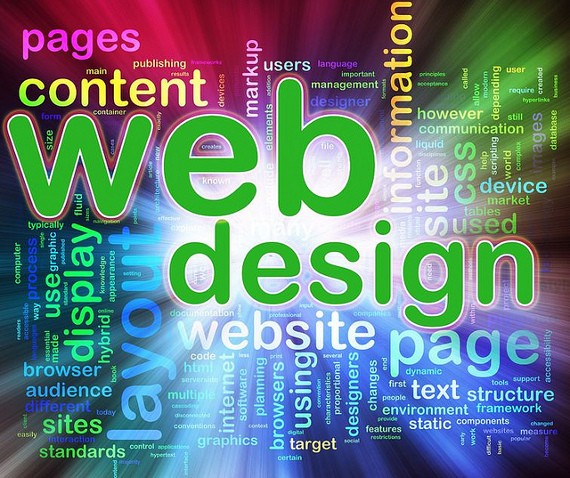
Your Web Designer Toolbox
Unlimited Downloads: 500,000+ Web Templates, Icon Sets, Themes & Design Assets
Starting at only $16.50/month!

Table of Contents:
- Web Design is a Broad Field
- Why Web Developers Should Learn Web Design
- Online Courses for Web Designers and Developers
- The Noob Guide to Web Design And Popular Web Terms
- Guided Tour Through Web Design History
- 10 Awesome Tools to Boost Your Productivity
- Understanding the Basics of Copyright Laws
- Context Specific Web Design In the Specific Industries: Sociology
- Quick Photoshop Tutorial: Create A HD Television Icon
- Designer Toolbox: Top 20 Widgets for Your Macbook
- Expert Tips on How to Build a Multicultural Website
Web Design is a Broad Field
Saying “I want to learn web design” is like saying “I want to learn how to cook”. There are thousands of recipes out there and many different styles of cooking.
There are thousands of web design specific tools and general principles that every designer should know. Since web design is such a broad field, many people simply ask how to get started! It’s this question that stops people from even getting started at all with web design. With so many tools to choose from to start learning, they end up at not choosing anything at all. This is a well-documented psychological principle.
My Experience Getting Started with Web Design
I, too, was overwhelmed by the choices I had to make about how and where to get started with web design. Should I learn Dreamweaver first? Or Photoshop? Or maybe learn how to code in JavaScript? I could have done any of those things. The truth of the matter is, there are lots of resources for learning design, so many of us face an overload of choice and when you have plenty of choices, you often tend not to make one at all. This resource will help you understand which programming languages to learn.
Dreamweaver is basically a program that helps you code HTML and CSS faster. It’s a text editor and you can just as easily start with Notepad, but you’ll spend a lot more time coding. So Dreamweaver is basically a time saver, but not a good tool to get started learning web design. That’s what I learned the hard way.
So I chose to learn HTML and CSS first before learning any software.
Why You Should Get Started with HTML and CSS
Most of the websites (I’m guessing 99%+) are made in HTML. Just go to your favorite website and press CTRL+U (this should work on most browsers, alternatively, find the “View Source” option in your browser).
Do you see things like <p>, <a>, <strong>, <script type=’text/javascript’>, <span>, <style> and so on? Those are called HTML tags. No worries if you know nothing of this, you will soon.
HTML is the structure of almost any modern website. What about CSS?
CSS is basically giving that structure a style. Without CSS, websites would look awful, something like a bunch of text in a Notepad file.
To truly understand and become a good web designer, I think it’s crucial to know these two simple languages. The good thing is, they are really easy to learn once you grasp the logic behind them. Don’t worry, this has nothing to do with actual programming languages like PHP, Javascript or C++. They’re entirely different universes. Learning HTML and CSS as compared to these languages is like learning how to ride a bike versus flying an airplane. Do you know how to ride a bike? Then you probably have the ability to learn HTML and CSS. Here’s how:
How to Get Started with HTML & CSS
This is where I’ve tried and failed numerous times. In my opinion, choosing the right books on learning a particular topic can be the difference between giving up and staying on track. The right book will present everything concisely in a fun and engaging way.
One such book is Head First HTML & CSS. Generally, speaking, all “Head First” books are better than other literature on the topic.
This book might be the only book on HTML and CSS that actually focuses on your learning experience. They apply a lot of research-based learning principles to help you stay motivated and, most importantly, help you feel that you have accomplished something! This is the problem with other books: they simply have no feedback mechanism to tell you that you’ve made some progress (some of them tell you “congratulations” after finishing the entire book, but that’s far from enough). You have a pretty extensive preview on Google Books if you want to see what Head First HTML & CSS is all about.
Before accidentally stumbling upon this book, I had tried around four other books but gave up on all of them mostly because somewhere in the middle, I found myself stuck at a concept that those books failed to explain in a clear way. No matter how many times I tried to “re-read” that section of the book, it was impossible to grasp it. Yes, searching on Google helped, but after the third or the fourth time getting stuck on a concept, I started wondering “Why should I continue reading the book at all when things are explained so poorly? Why should I waste my time with it when I can pick up another book or learn from the web since I’m Googling everything they say to get a better grasp of it?”
Trust me when I say it, choosing a GREAT book to get started with ANY topic is a major deal.
Give Me Some Resources!
2012 was a great year for the “online education” industry. There were a lot of new startups to really help you learn web design. Some of them are:
- Learn Web Design, Development And Business: The Only Course You Need – our very own free training course teaching graphic design theory, web design, WordPress, freelancing
- RockingCode – 1stWebDesigner’s Own Ultimate Web Design Course in 2015
- Codecademy
- Udacity
- Mozilla Developer Network
- Udemy
Of course, you always have 1stWebDesigner and some of its really amazing articles, such as:
- Basic Visual Web Design Mistakes
- Learn Web Design – Quit College (really good advice there, by the way)
- Call to Action – Web Design Usability
I highly recommend you read these articles but only after you have set your foundation right with a good book.
What’s next?
Well, once you have learned the basics, it’s time to delve into WordPress. WordPress is the easiest and fastest way to start building professional websites for clients.
If you are a bit more experienced with PHP and WordPress, consider reading also more about theme frameworks, for example Genesis is the best choice for professional web developers. Read here why.
A Book is Not Enough
Consistency is the key when getting started with web design. Are you learning everyday? Are you applying whatever new concepts you learn at least three times a week? Learning a little bit everyday is way better than covering a lot of material in just one day of the week.
But how exactly do you get consistency? Are there any ways to improve your chances of taking more action regularly?
Making the Right To-Do Lists
I once read about a study where the goal was to get more students to do a specific thing like writing a report. The researchers separated the students into three groups:
- The first group was just told what to do, in this case, it was “write a report”
- The second group was told not just what to do but where to do it, in this case, “write a report in the library”
- The third group was told what to do, where to do it and when: “write a report on Monday at 3PM in the library”
Can you guess which group completed the task more than the two groups?
It was the third group, which was not just told what to do, but also when and where to do that thing.

When you want to do something specific, it’s also a good idea to specify when and where you plan to do it. The “when” part doesn’t have to be at a specific time. It can be “immediately after I wake up” or any other activity you normally do, like “immediately after I get back from the gym”.
It’s also a good idea to keep track of all your daily tasks using a checklist. Tracking my goals for the day enabled me to discover the periods of the day when I am most productive (it was in the morning, immediately after I used to wake up).
Motivation is like Fuel
Motivating oneself regularly helps you accomplish more with your time.
For example, I was a lot more motivated to learn programming when I read blogs like TechCrunch talking about various small startups being bought for millions. The startups were all software based and some were relatively simple to make — this pumped up my motivation even more!
Discovering what motivates you can be discovered mainly by observing yourself and the way you act.
What Are You Waiting For?
If you were surfing the web and stumbled on this article and got to this part, I want you to slow down and relax now. Just forget about everything for a moment. Ignore that rush of browsing to the next webpage and then the next… one of the best ways to gain self-control is to relax for a moment.
Now think: can you set up a goal tomorrow at some exact time to start learning web design? A goal such as “Read 30 minutes of Head First HTML & CSS, or some other preferred book.” Also, when will you start? 3PM? 4PM? Immediately after waking up? Decide the time.
What is the current biggest obstacle that you’re facing when learning web design?
I’ll be waiting for your feedback in the comments!
In the next section we will look at things every beginner should know.
10 Things Beginner Developers Should Know
If you are a novice developer, it might be confusing about where you should start, because the field is broad and provides many options for you. There are so many questions you might ask yourself, such as “What programming languages should I learn?” or “Should I also know front-end, or only back-end?”
And I am sure there are much more than that. Well, in order for you to be able to start with an advantage against the others, I’ve decided to help you start your career as a developer with the following list of tips.
1. Decide upon the skills you want
When starting out as a developer, you really need to focus on something and avoid being too much of a generalist. There is nothing wrong with knowing more programming languages, but it is always an advantage if you are outstanding in one of them. There is nothing wrong with being outstanding in all of them either, but you can’t really do this in the beginning, therefore focus all your efforts on learning a skill and market yourself as an expert in that field. It can be PHP, Ruby on Rails, ASP.net or C#, but be good at it…really good! After you master one of them, you can obviously move on, but don’t do this until you have strong knowledge in that field.

This tip is also good for front-end designers, who always start with HTML and CSS, then move on to JavaScript, jQuery, AJAX or whatever it is they are interested in. Sure, you might be able to learn HTML and CSS at the same time, but this is because they kind of work together. You can’t really master PHP and ASP.net in the same time – unless you spend 20 hours a day on it, which I do not recommend – therefore you have to learn them one by one.
Now because you are a beginner and do not know anything about hardcore programming languages, it might also be a difficult choice for you, but there is a solution. Think of what you want to develop – if it’s WordPress themes, then dig into PHP; is it custom management systems, then try ASP.net; is it iPhone games, then learn C# and so on. Just do a bit of research about what each language can do and start learning.
2. Learn it right
Another tip for you beginners out there is, regardless of what language you choose, to learn it correctly. If you learn HTML by coding with tables, it is just not right and experts will for sure agree with me. Coding using the latest web standards seems useless to some, but it is really important and I advise you to do it. It will not only improve the loading speed of your product, it will also be easier and it will make more sense. You can learn how to build a website good way from 1stWebDesigner course too.
3. Google is your best friend
It doesn’t really matter what kind of problem you have, I am sure Google can solve it. I am also a very big fan of Coding Forums and I strongly recommend you use it if you encounter problems – and you will, believe me. But before posting a question on the forum, try to search for a solution on Google, because most of the time you will find an answer to your question, or at least an answer that will guide you to solving the issue.

4. Copy code
This goes mostly for designers, but sometimes developers have knowledge of front-end design and make their own layouts before starting to code them. I encourage you to look through other pages and how they are coded. If you like the style of a container, look at its source and analyze it. Firebug works just great in this case. Let’s face it, this is the way most people learn how to code. What I don’t advise you to do is to steal the design. This matter is unforgivable and shows a lack of respect, but I don’t see any problem in borrowing snippets of code from here and there. If a design can be copyrighted as someone’s, code can’t, so you are not doing anything illegal either. I might stir some controversy with this one, but I will stand by what I said: copy code from here and there, this is the way to learn how to do it properly – but don’t ever steal a design.
You can also learn how to utilize frameworks to become 10x more productive and faster when building websites.
5. Become part of a network
Another important thing is to have a network within your field of knowledge. It never hurts to know fellow developers and designers – worst case scenario, you have to go back and search Google for the answers you need, best case scenario you have some interesting discussions and can get help if you need it. You may even collaborate with your fellow developers on bigger projects, which will probably be good for both of you.
My design teacher always told me to have a network and recommend each other. Are you close to landing a project but you are not sure if you can handle the type of work that’s involved? Recommend your friend! He will probably do it better than you (if he is an expert in that specific area) and you might get clients or work from him too at some point in time. Get a network and keep it close, there is always need for a fellow developer around.
6. Understand designers
I advise you to understand designers in case you have no idea how they work. I am talking about both graphic designers and front-end designers. It is always good to learn how they work and why they might deliver static pages that can’t really be coded according to the latest web standards. Learn how to talk to them and explain what was wrong and nicely ask them to fix their mistakes. This way your working relationship will be closer and your results better.
7. Use professional tools
Although HTML and CSS can be used with notepad, I don’t recommend it. And if I don’t think that you can code properly in HTML and CSS using notepad, then I definitely don’t think you can use this default tool for PHP, ASP.net or Ruby. Get yourself a professional tool, which can be Dreamweaver, Coda or anything else, but use what professionals use, otherwise you are not one of them. They check errors, help you with auto complete and give you suggestions. There is a reason why Dreamweaver and Coda are the two most used IDE’s (integrated development environment) in the World – they get the job done in style. So go right now and get you the right tools if you don’t have them.
We also recommend using premium WordPress theme or Genesis Framework by StudioPress (read reviews in links)
8. Keep the cool stuff for last
Each programming language has its own “cool version”. For example, HTML has HTML5, CSS has CSS3, JavaScript has jQuery and AJAX and so on – I think it’s way better if you learn the basic language and then work your way up to the cool stuff. This is also because the cool stuff works with the basic elements so you won’t be able to develop a jQuery slider if you don’t comprehend basic JavaScript.
9. Get informed
It is always good to stay informed about what is happening in the field. You can do this either by reading news feeds, online blogs or even books and video tutorials. Stay updated and make sure you are one of the first to go out there and offer products developed with the latest technology. In the beginning it might not work that much (people might want to keep the “old” technologies until the new ones show their worth), but I am sure there are also people who want to own a brand-new product developed with the latest technologies – this will give you an advantage and will make you known in the field.
10. Go on with the learning process
After you become a master in the field you started with, work your way up with other languages. There are so many of them and knowing more than one will always be beneficial in your career. Keep an eye on the most important languages and learn the one you think is more interesting. When you master two, go on with the third and so on. Continue this until there is not much else to learn – although this is quite impossible. This is the way to success.
Conclusion
It is quite common that beginner developers have a rough time starting in this deep field, but I hope these tips help you find your way around. It does not even matter that much where you start from, all that matters is that you actually start. I think this usually takes the most time, so don’t waste these precious days and head off and find your first developer book right away!
The next section will tell you, why it is good that you learn web design. Especially if you are already a web developer.
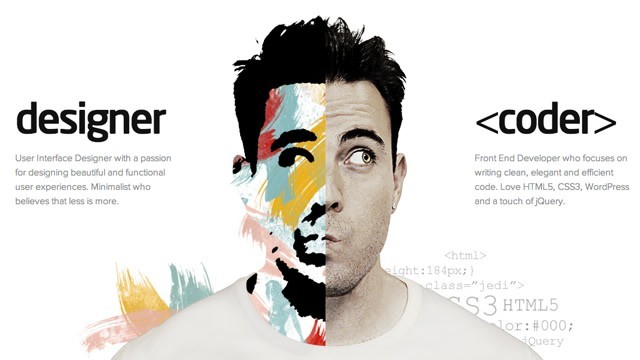
Why Web Developers Should Learn Web Design
As a web developer, you are in charge of making the website do things. You are responsible for creating interactivity on the site, which may may include jQuery and Ajax validation forms, submitting forms to database, rollovers, sliding menus or many other aspects of the site that needs programming. But how about the website’s design?
In my previous article Why Being a Web Designer Who Codes Is Way Cooler, I talked about why web designers should learn how to code and its benefits.
For this article, I encourage developers to learn proper web design process and how this will benefit them.
Why user experience is a big deal
Building a website nowadays requires more than just coding. Regardless how interactive your website is, website visitors might not have a good experience browsing it if the structure and design look awful. Thus, you lose the site’s quality and visitors.
Web developers need to be more than code-generating groan people
With the modern web gradually developing, we are expecting much more out of our digital life- and the guys behind each website. Web developers are typically problem solvers. They most likely prefer to make the web pages work than make it look good and fascinating. But this might not work nowadays.
Take this as an example
Have you tried hiring another developer for a project you are working on?
You went through the process of verifying that developer’s skills before hiring him or her. You informed that developer about all the details you want for the site project, including the design and features. That developer confirmed that he or she can do it on time.
When, in the end, the web developer presented the website, the site design still looks awful, though features are there.
A lot of clients have had this kind of experience. That’s why it is important that a web developer must also learn the design process to become more efficient and productive.
It doesn’t mean coding doesn’t cut in anymore but web developers should improve themselves beyond coding. Here’s why:
- To become more responsible and completely human members of the team or company
- It would be much better if a web developer can also create stunning websites
- Plus, the web developer can also work on its interactivity at the same time

Why web developers should learn how to design
Being a web developer is cool but being a web developer that knows how to design stunning websites, is a way cooler. The following are the reasons why a web developer should learn how to design.
1. Improve your graphic design skills.
Learning the design process will immerse you to different graphic design tools and design inspiration.
2. Improve your web design taste.
If a web developer learns how to design, he or she can easily differentiate a stunning website from a terrible one. It’s more about improving the aesthetic eye, that is, visual skills will become more refined and the web designs skills will naturally conform to your acclimated aesthetics.
3. Competitive web development.
Learning the design process will help the web developer understand the business requirements more. He or she can be edgier because he or she can bring some excellent look and feel apart from the interactivity he or she brings to the table.
4. One man web development.
If a web developer knows how to perform the task of a web designer and web developer, this allows that said web developer to earn more as he or she don’t need to get someone who can design for the project.
Some tips on how to learn web design
1. Look for inspiration.
Checking great web design inspiration every now and then will eventually refine your web design taste.
Zero in on these sites to immerse oneself in quality design:
- Dribble
- Best Web Gallery
2. Try some web design tutorials.
Practicing some tutorials about web design will improve your web design skills.
How about trying sites like:
- Ultimate WebDesign Training Course – we have put together 1stWebDesigner best content where you can learn all about graphic design, web design, WordPress, freelancing business learning
- Webdesign Tutplus
3. Get some feedback
One of the best ways to learn is to start doing and getting feedback. The key is making sure that your web design is as simple, intuitive and easy to use, yet providing a very rich content and feature set.
I suggest using sites like:
- Forrst from Zurb
- Silverback
Wrapping Up
There are so many advantages in learning coding and designing at the same time. In this article I showed you how both can help you achieve effective web development results. I want to emphasize that talent is not as much of a factor as most people would think. More often, interest is what people confuse as “talent.”
If you truly have an interest in something, you will be motivated to immerse yourself in it and practice it. Likewise, if you are a web developer, you can achieve creativity by learning and practicing it, which will later give you a lot of advantages in your career.
In the next section you we have prepared some great courses to improve your knowledge.
Online Courses for Web Designers and Developers
Web designing and developing are becoming very popular careers among the new generation. With new techniques coming almost every day, it becomes very confusing for designers and developers to understand all the techniques. But thanks to the Internet, there are plenty of online courses where you can get all the information you need regarding designing and development.
Some of them are paid while others are free but, they all come very handy when you want to learn the proper techniques of designing and developing.
1. Intro to Computer Science

This course is offered by Udacity. In this course, you can learn and practice the key computer science concepts by creating your very own versions of famous web apps. The duration of course is approximately 3 months with 6-hour per week sessions .
The course is available for US$150 per month with free 2 weeks trial.
2. Mobile Web Development

This course is also offered by Udacity and designed to teach web developers everything about creating great cross-device mobile web experiences. The focus is on creating mobile web apps that work on multiple platforms such as Android, iOS, etc.
The cost of this course is US$200 per month. There is a 14-day money back guarantee provided to the learners.
3. UX Basics

The course is offered by Teamtreehouse. It explains the importance of user experience and the reasons for which it exists. You will learn about the goals of UX designers and how they think, and what tools they use.
The course is offered through a membership plan starting from US$25 per month with 14-day free trial.
4. Programming for Everybody

The course is offered through one of the biggest platforms of Coursera. This course teaches all the basics about programming computers. Everyone who has fair experience about computers can master the materials through this course. The course is completely free and anyone can learn it.
5. Human-Computer Interaction

This is another free course offered by Coursera. It teaches you to create human-centered design skills so that you can create excellent interfaces with any technology. You will learn how to design technologies that have the ability to attract the visitors.
6. Create a HTML5 Game from Scratch

The course is offered by skillfeed and teaches you how to make HTML games easily. You can learn to make different action games similar to Zelda. Learn it from scratch without any previous experience. However, it is recommended that you learn basics about HTML and JS first before joining in this course.
The course is available with a monthly subscription of US$19.
7. Creating Seamless Textures in Photoshop

The course teaches you how to use textures in Photoshop so that you can create incredibly looking pictures. But, some basic understanding about Photoshop is required for the course.
This course is also offered by skillfeed and is available for a monthly subscription of US$19.
8. jQuery for Designers

This course is offered by tutsplus. It teaches you everything that you want to learn about the jQuery. The course can be learned in a very fun and easy environment. The course is available for US$25.
9. Mastering Sketch Design in Illustrator

This course will teach you to create a still life entirely in Illustrator. You can learn to sketch it through different drawing tools. You can render the objects with layered gradients, transparent shapes, and various blend modes. This course is also offered by tutsplus and available for US$25.
10. PSD to HTML – Flat Design Build

This course will teach you about PSD designs. You will learn to create fully functional HTML/CSS web pages. The starting files are available for free but to view the complete course, you have to buy it for US$25.
11. The WordPress Theme Customizer

The course teaches you to customize the themes and see a live preview of the changes. You can do it without toggling back and forth from the dashboard to the public-facing side of websites. This is one of the courses offered by tutsplus and available for US$25.
12. iOS Fundamentals

This course is offered by codeschool. You will learn to build iOS applications for iPhones and iPad mobile devices. The course teaches you the basics of iOS development and brings your app ideas to life.
The courses are offered with monthly subscription starting from US$29.
13. Ruby Basics

You will learn to master Ruby techniques with this course. The course is available at codeschool. It is helpful in increasing your Rails street cred by teaching you to build dynamic, sustainable applications for the Internet.
As this is offered by codeschool, it is also based on the membership plans, starting from US$29.
14. JavaScript Ember.JS

This course is meant to teach you about the powerful scripting language. You will learn to create lightweight applications with enhanced user interfaces. The course is offered by codeschool and available on a monthly subscription plans starting from US$29.
You now have some idea what to do and how to learn. However we know that is hard because the industry is always evolving. Read more how to keep going and where is good to start.
The Noob Guide to Web Design And Popular Web Terms
Web design is so much anchored on technology to a point that it is difficult for beginners to catch up, and if they even try to, it would be very difficult. For someone who has zero idea on web design, this can be pretty frustrating. You want to learn something new so you decided to try out web design. Because of this, you immediately looked for tutorials.
To your surprise, there are a lot of tutorials out there. However, browsing through each of those tutorials, you realize that these lessons are actually directed towards people who have designed websites before.

Your vibe dies and, eventually, you’ll just shrug your shoulders and admit to yourself, “Meh. I didn’t like web design in the first place.”
But would everything change if some article showed you the way? If just some tutorial kindled that small matchstick in your creativity, would you stop designing?
Of course, the answer to these questions depends on a case-to-case basis. However, things might have gone differently if you just saw great newbie guides to web design.
For non-web designers to want to try out web design, a noob guide would be great.
And yes, I’m going to give you one. So, keep your eyes glued in this article and let’s all start learning!
Learning Web Design
Since the Web has soared into popularity, interest in learning web design has also increased exponentially. Right now, there are a lot of people from different corners of the world who dream of building their own websites, and in the near future, earning from such activity.
This exponential growth dominoed into the increase of platforms and courses that guarantee you web design knowledge. There are blogs, forums and courses right here and there for your choosing. You just have to know which is the best one for you.
Here are a few avenues that may lead you to learning web design.
Web Design Schools

School-based learning is an alien term in the world of web design. Because schools have been traditional and often can’t keep up with the fast evolution of the industry, some think that they are already ineffective.
However, some people just find going to schools helpful.
This may play out to your advantage if you want to learn web design. With the popularity of the subject, you will always find a university that offers web design classes.
Going back to school might prove to be an effective method because it is more formal and systematized. It also teaches in a pace you can keep up with. However, if you are on a very tight budget, this is not recommended because going back to college is not as easy as it sounds.
Reading

Of course, aside from sitting in a classroom, listening to some guy blabber about web design, you can learn while staring at the letters flashing through your computer monitor.
Reading is one of the many ways you can learn web design. Now that design blogs have become a profitable niche in blogging, web design resources, tutorials and inspirations have become easier to access.
The timeliness of reading as a way to learning something will always remain. As we live in a time where most people can read, it should always be the go-to method in self-instruction.
Although, some view it as a lesser interactive and entertaining way of acquiring new knowledge, some people find it the most effective one.
Some Resources to Check Out:
- HTML & CSS Book
- HTML5 Rocks
- 1stwebdesigner Blog
Video Tutorials

The prevalence of videos directed towards learning has been notable since the inception of video cameras. For such a long time, videos have become effective ways to teach and learn.
In the world of web design, video-based instruction is very popular. However, there are only a handful of tutorials that offer in depth and high quality teaching. The reason is, it takes too much effort, time, knowledge and resources to create instructional materials with the depth that everyone is looking for.
That may be the reason why some courses are pricy. There are some learning centers that also offer subscription-based learning where you pay a fee for a month to be granted access to a library of web design knowledge.
Resources to Check Out
Web Design Jargon

A jargon is a special word or expression used in a particular profession or group and are difficult for others to understand.All professions in the world have their own jargons; web design has its own language too.
Here are a few web design terms and their meanings:
Anchor Text
An anchor text is the text a link uses to direct to your website. Anchor texts play a big role in increasing and optimizing your website for search engines.
Back End
A website’s back end is a facet of the website not visible to regular visitors. It includes information, structure, applications and Content Management Systems that controls everything within the website.
Backlink
A backlink is a link attached to any element within another websites page that links to your own site. Also known as track backs, these links play a great role in increasing your site’s web search engine ranking.
Bandwidth
Bandwidth refers either to the rate the data can be delivered or the total amount of data transferable from a web host on a given time. Measured in bits-per-sec, kilobits-per-sec and other metric measurements, bandwidth can affect how fast your website loads.
Bounce Rate
Bounce rate refers to the number of people who browse your website without clicking any other page. This percentage commonly reflects the beauty of your website navigation and content. When your bounce rate goes high, it would only spell something wrong.
Breadcrumbs
Breadcrumbs refer to the small elements found in the website’s navigation. They commonly appear near the top of the webpage and shows the pages, sub-pages and other directories the said page is placed. Example, in a website’s breadcrumbs, you see: Home>Blog>Web Design>Inspiration>Post.
Cache
Cache are files that are saved, copied or downloaded from the website by your browser to increase the load time the site is visited, it will load faster.
Content Management System
CMS as it is famously known, these are backend tools for managing a website’s content. It also separates the content from the design itself and the functions.
DNS
A DNS or Domain Name Service’s main function is to convert your IP address into domain names. DNS servers are commonly provided with the IP of your website when you purchase a web host.
e-Commerce
Electric commerce or e-Commerce refers to the usage of websites to buy or sell goods. Transactions in E-commerce websites can be physical services or products delivered using email or direct download.
Em
An em is a unit used to measure fonts and other web elements within a webpage that relates to its parent. 1em is equal to the point size for the font defined within the parent element.
Fold
The fold is the point on the webpage that is shown initially. Anything that you see below the fold are the elements you see when you scroll down.
Front-end
A website’s front-end refers to the components of the website that the visitors see. These are pages, images, content and UI.
Hexadecimal
Hexadecimals, also called “hex” numbers are a base-16 numbering system used to identify colors. These numbers include the numerals 0-9 and letters A-F. They are written in three set of hex pairs: the first pair defines the red hue, the second green and the third blue.
.htaccess
The .htaccess file is a default configuration of the apache server. The configurations contained within the .htaccess determine which file is placed.
HTML
HyperText Markup Language is the primary language understood by web pages. HTML is intended to provide the framework and content of website.
HTTP
HyperText Transfer Protocol is a set of rules in order to transfer requests between browsers and servers.
HTTPS
HyperText Transfer Protocol over SSL (Secure Socket Layer) are set of rules for transferring requests from a browser to the server (and vice versa) only that it uses a secure and encrypted connection.
Landing Page
A landing page is the page the visitors see when they enter the website. Landing pages are specifically designed to call action from the new visitor.
Meta Data
A meta data is a data contained in the header that shows the information about a web page the visitor is on.
Permalink
A permalink or “permanent link” is used on blogs to define the permanent address of a given blog-post.
Plugin
Plugins are any bit of third party codes that extend or increase the capabilities of the website. Plugins go with CMS or blogging platforms and make it easier for the developer to have functions added over time without re-coding the website.
Really Simple Syndication

RSS or Really Simple Syndication is referred to as the standardized XML format that allows content to be syndicated between two or more websites.
- Resolution
Resolution is used to define the number of pixels displayed in the screen.
- Script
These are portions of code in an HTML page that adds dynamism and interactivity.
- Web Server
A web server is a computer software that allows a computer to host websites, web and web pages to make them available anywhere.
The Web Design Process
When web designers acquire clients, they follow a series of steps. These steps organize their work and allows them to monitor their own progress as each step is completed.
Here are the six steps in the web design process:
- Research

The first step in any web design project is to gather information that may help you in designing. Obviously, the information will allow you to understand the target audience, the possible content and design of the website, all of which are necessary to make the website successful in the future.
Here are a few things you need to consider:
- Purpose
- Goals
- Target Audience
- Projected Content
-
Planning

Planning is one of the most important steps in this process because it’s in the step where the concept of the project is built. This also requires constant communication with the client to determine the details of the project that will be retained or removed.
- Design Proper

This is the step where you make ideas real. In this stage, web designers plot the ideas approved by the client into functional visual representations.
Here are a few sub-steps:
- Wireframing
- Mockup Creation
- Designing
- Re-designing
- Slicing and Coding
-
Development

In this stage, the web designer becomes more like a shadow as the developer takes over. Because it includes a lot of programming and content creation, this process can be very complicated and distressing. Codes need to be organized, commented and referred to the original concept.
Now we are going to take a step in history of web design. Ready? Alright!
Guided Tour Through Web Design History
Twenty years ago nobody knew what they were doing when designing a website. It was all something new and you couldn’t talk about strategies, research, laws, theories and typography. It was all chaotic. And it all started in 1989, when the first browser called World Wide Web was released, in the same time as the first website. However, it is not possible to see the first website ever, as there isn’t much information about it, but a website looked pretty much like this one and was used to give out basic information.
It all continued on a very slow path until 1996, which is considered by many the beginning of a new era in web design. Designers started using background colors – most of them really vibrant and painful to look at – but some of them kept it simple and decided to go for white – and even used some other fonts than the default ones. In this era people started overusing the animated GIFs we all hate today.
In the screenshot below you can see the Yahoo! website back in December 1996. This is one of the good examples of that year, but trust me, not all of them looked this good. You’ll see other websites below from 1996 – I am sure you can’t look at them for too long and would be able to make a very long list of mistakes. People were not doing this back then, because the web was quite new and they were really happy with the websites they had – these were huge achievements for them back then.

Yahoo!’s website in December 1996
McDonald’s webpage was incredibly hard to look at, although there was not much text. The background red combined with the yellow created a very powerful visual – truth is that everybody associates this color combination with McDonald’s today, so it might be also thanks to their first webpage.

McDonald’s website in November 1996.

aol.com in December 1996
Aligned to the left and with a maximum width of around 600 px, Apple’s website was not very smooth back then – unlike today. However, their design was still one of the best available on the web and looking at it didn’t affect your eye’s health at all, unlike some of the other ones.

Although not as fancy as today, Apple’s design from March 1997 was one of the best on the internet.
Shortly after this era, another one started: the era of Cascading Style Sheets. Although not even half as advanced as today, CSS made a huge difference back then. There were still many wrong colors being used, but the layouts started getting better and you can see in the screenshot below some of them even used a grid system, if you are not so demanding and precise.
Yahoo’s June 1998 website was actually looking good and it was one of the best of its generation. But what would you expect from the king of the web during the 90s?

Yahoo! Kept a white and clean background, but still had blue link colors.
Google’s 1998 webpage, although the service was still in beta, looked really simple for that period, a trend which the American giant has continued with, right up until today. The main functionality of Google was and still is searching, therefore there was no reason to clutter the site too much.

Google Beta (1998) had a smooth design.
As you can see in the screenshot below, Apple’s webpage evolved a lot from 1997 to 1998 and already started looking like what was going to be one of the pioneers of the minimalistic approach. Big visuals, not a lot text, no advertising and an interesting layout – this all started shortly after CSS1 and continues to this day.

Apple.com in July 1998
Even AOL’s website looked better by April 1998. They started to have a grid system, used the colors of their logo and personalized their menu by using buttons.

AOL in April 1998 (not all the images captured)
The colors were becoming even more popular because designers thought they will keep the people on their web pages. They didn’t think the same colors would make it impossible to look at the page for more than a few minutes. However, as said before, the good that came from this was the fact that it associated colors with brands – blue for Microsoft, red and yellow for McDonald’s and so on.
Another problem were the fonts. Times New Roman and Courier New were very popular (Comic Sans was already released and soon to become hugely popular). Although there were many other options, people preferred to use these two typefaces in everything, from web pages and invitations to e-mails and documents. Writing with black was popular and everybody kept it like that. If there was something which needed to stand out, red was the color of choice. Otherwise I am sure you remember the blue underlined links (which you can see in most of the examples shown here until now). Because typography was not an important part of the design, bold and italics were not very used either to make text stand out. A font that was widely used in the 90s and is still very popular today was Arial, which can even be seen on AOL’s website.
Leaving too much empty space was madness back in the 90s, also because centering a web page was not very popular. You can see Yahoo!’s first website (shown above) and notice how much empty space there was on the right side. People also started using background images, but because the images were not big enough, in many cases they started to repeat them and this created an awful visual.
Buttons also started to appear and become more and more popular, because they allowed designers to further customize the menus and put the focus on the navigation, while icons were also used all the time – it was the first time when visual elements had a use. This was also the period when animated GIFs exploded and everybody used them. There were almost no websites without them and people really appreciated the effect they created.
The year of 1999 was the year of a change. People started to design smarter and thought more about usability, grid systems, layouts and even colors. Most of the websites with vibrant background colors were redesigned and started looking better (McDonald’s got rid of that vibrant red from the background one year before).

CNN’s webpage in August 2000 (not all the images captured)

Microsoft in February 1999 (not all the images captured)
Shortly after this, bright colors were on the way out and creating contrast between the background and the font color was critical. Most of the designers started using white as the default background color and it worked really well. Designers started designing in pixels instead of inches like they had been before. Maybe the most important thing was the fact that the content of a page was ordered, with the menu being in focus most of the time.
The importance of typography increased as well during this period, with people thinking a bit more about the target audience. Comic Sans becomes popular for child websites (although for a period it was used for everything) and some other fonts come into focus. There was no option for embedding back then, so designers were constrained, but at least they started to experiment more with what they already had.
Websites were not flexible at all back then and because of the many screen sizes available, it was difficult to design something to look good for everybody – responsive design was just unheard of. The use of buttons started to decrease as well because people learned how to properly play with font and colors – typography’s importance increased even more.

GoDaddy’s website from December 2002 even had a dropdown navigation.
By August 2002, Apple’s website looked a lot like the one they have today. The navigation was a dropdown, they used big images for the featured article/product and four small boxes for other products at the bottom – a lot of similarity with Apple’s current website. The Cupertino-based company showed everybody how they should design a simple, but effective website.

Apple in August 2002.
The use of icons and boxes increased. As mentioned earlier, icons were a good way of focusing the users attention (especially on navigation links), while the boxes were used to help the user find his way around the website and also for structuring content. Luckily, the use of animated GIFs decreased by this period and they would never be as popular as they were a couple of years before.
Another era started in 2002, when the so-called web 2.0 concept appeared for the first time. The use of colors became more theoretical and everybody used them to make the websites more appealing, rather than flashy. The use of Flash – right then on its way in – was popular until 2008 when its use decreased dramatically. Flash animations became more and more popular and most of the websites started looking more professional, as we would say today.
Forums were already spread around and most of them had the same look and feel, like in the image below.

Softnews Romania in February 2003
Shortly after this, the hover effects started to appear and they were a hit. Everybody was using them because they created focus and helped the user navigate.
Footers were also increasing in popularity and they were always used to display copyright information, privacy policy, terms of use or contact information.
Color palettes started to become harmonious and be used wisely. They started to create impact and designers knew that, if used correctly, colors can make a huge difference, especially then when not everyone had this information. The use of typography increased and, combined with colors and contrast, made the text interesting – for the first time in web history.
Responsive web design still didn’t appear at this point, but at least there were no more problems with background images. Now it was easy to calculate everything in pixels and repeating background images disappeared (they appeared again later on to create what we now refer to as patterns). Also, using background images instead of solid colors went low-key and designers preferred to avoid it.
Probably the first real interactive website was one for Coca-Cola. They showed the world how to use colors smartly and how to integrate them with flashy, visual animations that kept the users on their page for ever, even if there was not really too much going on there.
The web as we know it today started in 2005, when everybody realized cluttered sites are not popular, and started to keep them as simple as possible. Single pages appeared and made a huge impact because they were just what lots of users needed. Single pages gave design a fresh look and simplified the navigation. Designers started playing with font sizes and color and combined them so that text was in focus – integrating multiple fonts was tried for the first time in this period. The “back to top” button was also seen for the first time in this period and many websites adopted it, as it made navigation easier.

By mid 2006, Yahoo!’s webpage was simple and effective – no flashy elements.
In this period websites were becoming more than just a way of supplying basic information. They were part of an identity, soon even a part of a strategy and people visited them not only for information, but also for relaxation and inspiration.
In 2008 another era started, which lasted for only few years (although some signs of it are still online today). This was the retro period, where old fashioned elements started becoming popular. No, not the GIFs and the tables, but retro colors, text, illustrations and other elements could be seen all over the place. This is also when the minimalistic design approach started, but it was nothing more than an idea yet.

forefathersgroup.com incorporates lots of retro elements
The minimalistic approach started to become more than just an idea in 2010. We are currently in the minimalistic era, where it all has to be designed fast, it has to stay simple and still do its job and create an experience for the user. At the same time, although many websites turn to this concept, each one of them has to have something special – so that people will remember it and come back. Now it’s a lot about colors, typography and contrast – the best one being between white and black.

How simple can a website be? Apple’s the best example.
There are things we can notice everywhere. The color palettes are congruent and are not thrown out there just for the sake of it – they are used with a purpose. Hierarchy was introduced as well and it is not only shown through position, but also through font size, font type and colors. Balance is also a key word in today’s web design and creating a positive, attractive atmosphere on the website is the purpose of any designer. Responsive web design is popular today and there is no such thing as not being able to make a website look good on all the screens.
The typography goes beyond limits and being able to embed fonts made it even more challenging and interesting. Although too many fonts can lead to a bad design, if you know how to use them you will learn the key to getting people to read your text. Buttons are still used (think of Twitter, Facebook, LinkedIn and RSS) and are the way to navigate through pages, although they are not widely used anymore in menus. The problems with images and resolutions disappeared as well.

There is also a new style in town for background choices. There can be images, patterns or even solid colors – in today’s web you can integrate them with everything. Animations are not popular anymore, but are still used here and then – however, they do not affect the loading speed of the sites as much as before.
With more than 20 years since the design started to develop, it is easy to see that everything moves fast and that everything keeps improving. It is amazing how you can think that nothing can be better, and then in a few years something new comes and everybody is excited about it. The internet went from rough to beautiful and useful and will most definitely continue on its path upwards.
To keep learning you have to be productive, so the next section will cover that topic.
10 Awesome Tools to Boost Your Productivity

In today’s busy world, everyone strives to save time. It’s interesting to see how some simple tools can help you a lot in increasing your productivity. Today I’m going to show you some tools I use everyday to increase my productivity. Some are Mac apps, but some are online ones, so if you’re not part of the Mac cult, its okay!
Good Old Fashioned Paper and Pencils
 To start, Paper and Pencil. Yes, old school, but it does me good!
Features:
- Can be used as a planner for both school, work and everyday life.
- It’s a hard copy, something that guarantees won’ be destroyed by hard drive failure.
- Paper can be everywhere you are. Can you say the same for your computer?
I like it because: I like to use a combination of my Moleskine notebook and index cards, because everything gets easier to organize. I use my Moleskine as both a school/day planner and a hub for all my to-do lists and important things to remember. (Sometimes even recording Vocabulary words or Polyatomic Ions to memorize)
The Hit List
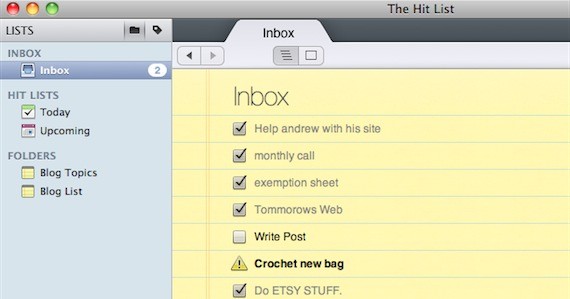 Next, I use a commercial Mac app called, “The Hit List”; it’s a to-do list maker! It lets me make as many lists, or to-do’s as I need, and I can organize them with tags.
Features
- Manage and create lists for all aspects of your life
- Simple and Sophisticated
- Flexible, and great for any GTD flow.
- Easy to manage with schedules and syncs to iCal
I like it because: It’s great for me, because of its elegant yet usable design, and there is a nice calendar function to mark due dates of specific events. So, basically I can create lists for every aspect of my life in one handy application.
Note: This app came bundled as part of MacHeist 3. A lighter, and free app that does similar things is called, Anxiety. It’s what I used before this.
GMail and Google Docs
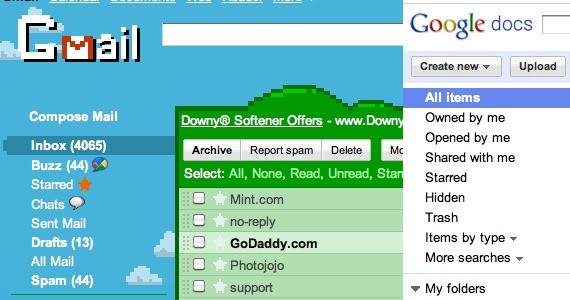 These next two web apps, GMail and Google Docs help take my data and files with me anywhere, without the need for a USB.
Features
- GMail is customizable, and comes with tons of space that really comes in handy!
- Easy to make files flexible – accessible anywhere on any computer
- Google Docs makes it easy to edit documents without a word processor.
- Great for rough drafts
- Ability to create spreadsheets, presentations and documents – great for school or work
I like it because: GMail and Google Docs work seamlessly together to bring the best of both worlds.
Google Chrome
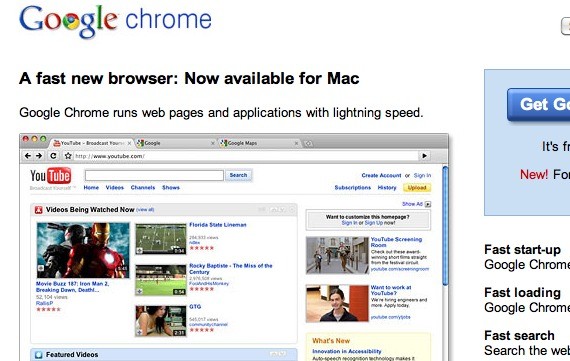 Google Chrome, a web browser created by Google, is amazing!
Features
- Available for many platforms
- Fast, Clean and Simple; Less clutter, more efficiency.
- Extensions for just about anything!
- Built in security, translation, and themes
- Easily arrange tabs, private browsing, navigation + search box
I like it because: When developing websites, it has nifty little features that make everything a whole lot easier. For instance, I can use the “Inspect Element” to inspect various elements on a website, including CSS and JavaScript! Sources are color-coded too! There are also a bunch of extensions available that boosts the design and development process as well. (Not to mention the pretty themes that are available!)
NetVibes
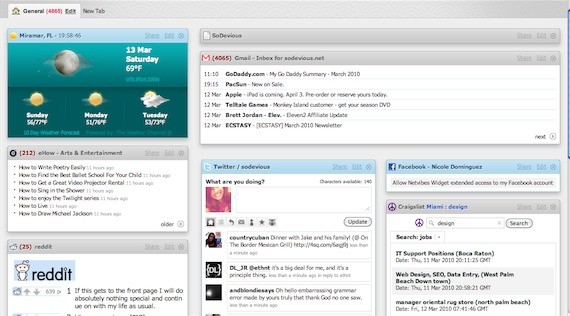 Netvibes, a web app, is a personalized start page that basically houses little modules of the weather, email, twitter, Facebook, Craigslist, etc; all in one homepage!
Features
- A personalized Web experience
- Easy to manage and update social media accounts
- Private and Personal Pages
- Accessible from computers or mobile devices
- More than 180, 000 widgets for a truly unique experience!
I like it because: It really saves me time by seeing important things all at once. What’s also great is that you can have more than one page, a “tab”. The handy google search that’s never far really ties everything together!
DaisyDisk
 DaisyDisk is another hesitated mac app, but is worth the money.
Features
- Helps free up disk space
- Smooth, Easy to use and navigate
- Gives you a new perspective on your files
- Shows you which files and folders are taking up the most space, in nifty, color-coded visualizations
- Built in File Previews
I like it because: I get colorful views on exactly where my space went!
GeekTool
 This next mac PrefPane, Geektool takes over your desktop and makes it totally unique. It basically adds text layers, with any kind of information you want, and makes amazing desktop customizations.
Features
- Available for many platforms
- Can show weather, emails, CPU usage, etc.
- Displays in “File, Shell, and Image”
- Powerful and easy to export and share
I like it because: It allowed me to get really creative with the way I wanted to display my information. Here’s a sample of mine.
Note: for Mac only, and I would only recommend to people comfortable with code.
GrooveShark
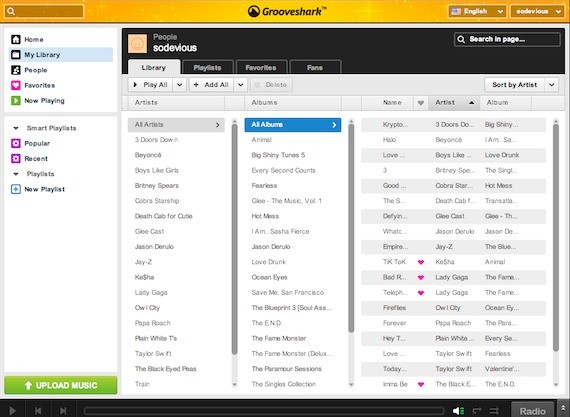 I like iTunes, but I love Grooveshark even more. Grooveshark is a web app for online music streaming, and totally free!
Features
- Browser based – no need to download anything
- Easy to discover new music
- Pretty, easy to use interface with themes
- Can organize music in a library with playlists
I like it because: This totally saves me time dealing with my iPod and iTunes. I also really enjoy this app because its super simple for on the go, and works great in school. The super simple functions are amazing, and very easy to fall in love with.
BrowserShots
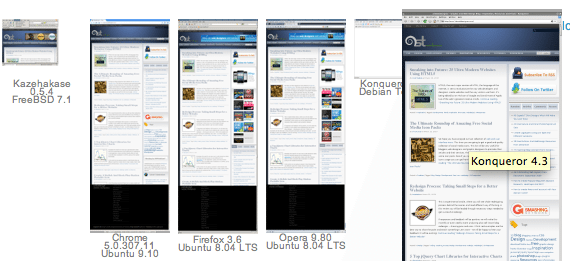 As Web Designers, we need to accommodate all browsers; pain right? I like to use a free web app called, BrowserShots.
Features
- Uploads screenshots of your websites on different browsers and computers
- Fast, Clean and Simple; Less clutter, more efficiency.
- Lots of options and settings
- Multi platform and browser
I like it because: There are tons of options to choose from, which saves me the trouble of having to run windows on my Mac, or downloading tons of other browsers.
Flow
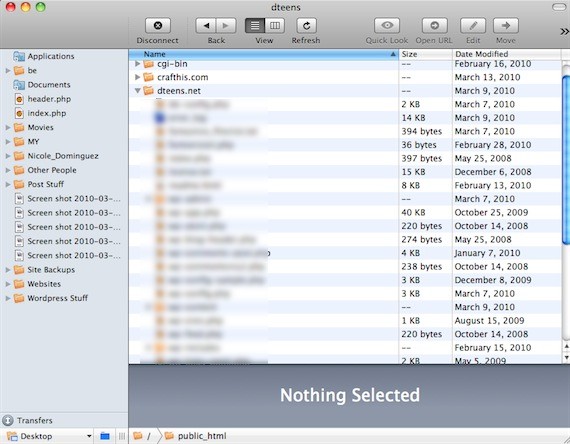 In a recently purchased nanobundle from mac heist, I got my hands on a Mac app called, Flow. It’s FTP that is as easy as using the finder!
Features
- Can connect to “FTP, SFTP, Amazon S3, WebDAV, and MobileMe iDisk servers”
- Clean design, easy to use
- Uses QuickLook and syncs with desktop or a remote folder
- Edit directly on server with In-app code editor
I like it because: I enjoy it, because it’s easy to edit files within and outside the program. Otherwise, it’s a great yet simple FTP program. You can even upload files, without having the app open!
I hope you enjoyed this post! Does anybody have their own apps to share?
Now we are going to talk about copyrighting laws. Very important thing to know when working in web design.
Understanding the Basics of Copyright Laws
Most people immediately assume that any web content is public property. It’s easy to copy images, articles, fonts or videos off the net. But if you don’t have the permission from the owner, you are illegally stealing and this could lead you to many legal troubles.
Copyright in a Nutshell
Essentially, copyright means a set of exclusive rights granted to the owner to print, copy, reproduce or publish copyrighted works. Initially, the copyright law only applied to the copying of books. Over time copyright now covers a wide range of works, especially in the artistic and creative fields. Works that can be copyrighted include the following:
- Literary works like articles, plays, scripts and stories
- Images and pictures
- Music, lyrics and sound recordings
- Architectural blueprints

Image from Norebbo
Registering a copyright gives the owner the exclusive right to control reproduction of works for a period of time, depending on jurisdiction, but more recently consists of the life of the author plus a few decades.
In the US and most countries, you do not need to do anything to copyright your material. Material placed in a fixed tangible medium is automatically copyrighted. You don’t need to register for copyright although you probably should. Register your material with the US Copyright office to enforce or strengthen your rights. After registering copyright within 90 days of publication, copyright owner can receive from ‘statutory damages’.
There are works that CAN NOT be copyrighted, including the following:
- works created or authored by the US government (except those under contract),
- ideas and facts (best thing to keep your brilliant ideas from being stolen is to keep them to yourself)
- reprints of public domain works
- common property such as calendars & phone books
- words, slogans, names and titles
- federal laws & court decisions
- recipes, educational procedures, discoveries, research methodologies
- fashion styles
- works with expired copyright
- scientific theorems, principles, scientific laws and mathematical formulae
So it applies on the web, right?

Image from crazyengineers
One thing about the internet is that anything can be taken from you in a snap. Putting content on the internet means everyone can get access to it. Copyright does apply to the web: codes, images, web docs are all copyrighted. Reproduction can mean printing a web page, copying HTML code, CSS or JavaScript off a site, downloading media to your drive or printing an image.
Q: All content from the internet is public domain and in turn free to use. Right?
A: Wrong. Just because content on the internet is publicly accessible doesn’t mean it’s public domain. Public domain are works where copyright has expired, typically 50 years after the author’s death. Examples are: Shakespeare’s works, the English language and some Sherlock Holmes stories.
Q: Since literary works like journals, stories and articles can be copyrighted. Does it mean your blog content can be copyrighted, as well?
A: Your blog content can be stolen from you. Easily. So don’t post anything online that may contain valuable information, something you can’t afford to be stolen.

Image from Michael Kwan
Having your blog post reposted by someone else is a good thing, it can increase web traffic to your site. According to Fair Use, copyright can be infringed to a degree for strict application of the copyright law may impede the production and distribution of the work to the public.
Q: Is it copyright infringement if I have the same blog title as another blogger?
A: Generally, titles are not protected by copyright.
Q: I want to use some old photos for my site, but I can’t locate the copyright holder. What can I do?
A: This is a case of an orphan work. First of all, check with the US Copyright Office if the photos have been registered. If you’ve exhausted all means to locate the copyright owner but still haven’t found them, document your search for the copyright holder. Recount the steps in the search process to show due diligence of your search. If the owner still takes claim of copyright infringement, damages are likely to be limited. It will not include attorney’s fees, making it more troubling for the owner to pursue the claim. (Medical Library Association)
Q: I downloaded something free photos and fonts from the internet. Can I use it at whim?
A: Freeware doesn’t exactly mean public domain. Ownership of the work still remains from the creator of the work. Know and comply with the owner’s terms and conditions. You may contact the owner to get their permission to use their work, whether for personal use, school use or commercial use.
Important Terminologies
- Fair Use – it is the exception to an exclusive right granted by the copyright law to the author or owner of a work. This allows everyone limited use to the copyrighted material without permission from the owners; especially for non-profit educational purposes. Examples for Fair use include news reports, reviews, research, commentary, etc.
- Moral Rights – it is the rights of the copyright holder or creator to be recognized in jurisdictions, even if they assigned their copyright rights to a third party, they still have moral rights to the work. It also includes the right to have a work published in a pseudonym, or anonymously. The moral rights bars the work from any alterations or distortions. Even anything that detract the work after it leaves the artist’s ownership, they can still bring the moral rights into play. Moral rights is recognized by the Berne Convention.
- Infringement – the violation of the copyright holder’s exclusive copyright rights. For movies, songs, music and other audio video media, illegal reproduction & distribution is known as Piracy.
- Orphan Work – work protected by copyright whose owner is unknown, difficult to find or impossible to contact.
- Public Domain – works that have expired copyrights or have ineligible for copyright protection. No permission is needed to use public domain works.
- Perpetual Copyright – this is fairly rare, perpetual copyright is a finite term that is perpetually extended. Examples include the King James Bible and J.M. Barrie’s Peter Pan.
Copyright Laws
Expiration
Copyright expires after a period of time. Copyright lasts at least the life of the author plus 5 decades after his or her death.
According to the Berne Convention (Copyright Service) the following duration period applies:
- For photography, a minimum of 25 years from the year the photo was taken.
- For cinematography, a minimum of 50 years from its creation.
- Anonymous works are covered 50 years from the date it was made available to the public.

Just like a parking meter, time expires for copyright, too. (Image from Scripting)
Once the copyright period expires, the work now falls into public domain and can now be used by everyone freely. You cannot claim an expired copyrighted work, which means you can use it freely (just as everyone else) and you cannot limit others from using the work.
Penalties
For an infringement to occur, the following elements must be present:
- Owner of the work must have a valid copyright.
- Person allegedly violating the copyright law has access to the copyrighted work.
- Duplication of the work is outside the exceptions.
Penalties for infringement include the following:
- Infringer pays amount of total damages and profits.
- The court will give an injunction to stop the violator from infringing the work.
- The court can impound illegal works.
- The law provides around $200 to $150,000 for the work infringed.
- Infringer will go to jail.
If you’re a victim of plagiarism…
So you caught someone violating your copyright. What do you do next? First, do not let all that anger go into your head. Assume that the person who infringed just made an honest mistake.
If someone steals your blog post into their blog without your even acknowledging you, one can invoke the Digital Millennium Copyright Act (DMCA). Known as ‘notice and take down’, you can notify the person to stop using your work. If they do not, contact their ISP to know their host and voice your complaint about their users stealing your content. The host will then take action and shut down the person’s blog or site without question.

Image from shareinvestornz
If you find infringement and violation of copyright laws and haven’t registered your work yet, it’s okay. You can simply register your work to the US Copyright Office and then file suit. However, if infringement happens before registration, you cannot receive compensation for ‘statutory damages’. You will only get an injunction–or a court order to stop violator from using your work.
***Most of these copyright laws are from the US, and the laws on copyright may vary from one country to another. Check your own copyright laws for more enlightenment. It’s important to be educated with laws to not only get yourself from any unwanted trouble; but also to protect yourself from any violations.
In the next section we will be talking about sociology. We know, we know, but hang on with us.
Context Specific Web Design In the Specific Industries: Sociology
An artist is a creative who creates to satisfy their own aesthetic pleasure, unconcerned with the wants and needs of others. However a designer is a creative who creates in hopes of satisfying the wants and needs of others with their art, casting aside their own individual creative desires. This is an important fact to always keep in mind for any professional in the creative field, because quite often we tend to forget that we make our living creating art that MUST be found appealing to others and not just ourselves.
Whether graphic designer, web designer, user interface designer, or any other profession that ends in the word designer, your job is to make art that others will enjoy. This logic behind this creative industry goes hand in hand with the principles of sociology, and corresponds with what the career sociologist does everyday in their respective field. To get a better understanding of the relationship of sociology and design, let’s first take time to understand exactly what sociology is.
What Is Sociology

Sociology can be best described as a broad study of the people, culture, living environment, and any other factor that may have the potential to shape someone into the person they are. This easily being summarized into one word, society. Now one can read that description and come to a conclusion that the approach of using sociology as a designer, is quite the same approach as using the well discussed psychology. In a respective comparison between the two studies, psychology is better defined as the study of the mind and sociology more so a study of the society (people, location, culture, experiences, etc.) that shapes a particular person may be apart of.
To get a good grasp on Sociology, the only real way is to sit down and take the time to learn. Of course we all don’t have the time to do that, so we are going to look at a few Sociological principles that I personally always try to remember.
- The culture of my target audience
- The age range of my target audience
- The social status of my target audience
- The geographical region of my target audience
- The current social changes(technology, cultural movements, political changes, etc.) taking place
How does that Relate to Design

In the introduction of this article, the idea that a designer’s main duty in their profession is to create art that is understood and appreciated by their audience. While giving a brief overview of what sociology is, we learned that it is the study of societies and different social groups. The question presenting itself to us now is how do these two correspond with one another? Take a second, or minute if you must, and think about it. There is no rush, nobody is judging your reading and comprehension speed :).
All poorly attempted jokes aside, the career of a designer and the social science of sociology are a perfect fit together. Instead of presenting a thoroughly descriptive explanation of sociology, we’re going to save that for a proper course and/or professor and look at a few common cases that showcase where a knowledge of sociology would be beneficial.
Case #1
You are an American freelance web designer who has never set foot outside of the States. The only information you have about other countries is what you remember from school history classes, the little bit of news you read online, and a few TV shows and movies you like. Despite this, you are presented with a project from the Sudan’s Olympic football (soccer in America) club to design and develop their website. They give you creative freedom to do as you please, and their only request is that you make sure to embody cultural aspects of the Sudan in your design.
The Problem: The issue the web designer has here is that they have no idea about the culture of the Sudan, what interests the people, and how they like to be presented.
How Sociology Helps: The main concept taught when one is first entering into sociology is how to properly study, and understand the cultures of another society. By going over the basic structure of what makes up a society, what influences a society, and what procedures and customs are common to a particular society. If this said web designer in this situation were to have knowledge of sociology, they wouldn’t have nearly as difficult a time producing a work of quality for their Sudan client.
Case #2
You are a graphic designer who specializes in creating graphics for promotional purposes. Your typical client is a company looking to promote a new product they are trying to introduce to a more adult audience. A new client approaches with a great project that really interests you, the only issue is that the client is asking you to create graphic work for a product being targeted at preteens.
The Problem: Throughout your career, you have always done projects whose key demographic was an adult audience. You have never even worked on anything aimed at teenagers, let alone preteens. To make this more difficult, you are well beyond the years of the preteen.
How Sociology Helps: One of the topics discussed in sociology is test groups. A test group is a controlled experiment consisting of different types of people in the demographic you are trying to reach. In this instance, the test group would be composed of preteens of various social and economic backgrounds. If done correctly, based on the desired size of the test group, the graphic designer in this case would have selected a good diverse group of preteens and will have the knowledge of the proper questions to ask in a test group experiment.
Case #3
You are a designer who specializes in working with musicians, bands, and other types of musical acts. Because of your affinity for Pop music, and your tendency to spend most of your time with those infused in the Pop culture, your clients are all musical acts of the Pop genre. One day you get approached by a Gothic band who plays Punk Rock.
The Problem: Unlike your usual clients, you have no idea how you can correctly approach this project. In this case you can’t use your own personal style or knowledge of the clients culture to create something of quality, simply because you are not personally interested in their culture.
How Sociology Helps: In Sociology one of the things discussed are subcultures. A subculture is formed by a group of people who develop their own culture, distinct and easily noticeable from the mainstream culture and other subcultures. In this case, the Gothic band is part of a subculture and the designer who is a member of the Pop culture would be considered mainstream culture. As well as properly defining this subgroup of a society, Sociology also provides knowledge base that teaches one how to properly study and learn about a subculture.
What To Walk Away With

It is impractical for anyone to try and compact an entire subject of study into one article, especially one as multifaceted as Sociology. The purpose of this article was never to give a full breakdown of Sociology, and the ways you can use it to automatically improve your designs. Doing this would be unfair, and present a bad outlook of what this social science is. Like anything you study, the information may be the same, but the individual implementation of it varies from person to person. So hopefully by now you have seen how beneficial Sociology is to your design work, and will go out and further the knowledge you have on the subject. This can easily be done by taking an online course, maybe one at university if you are still in school or going back, or just taking the time to read some books. Here are a few things to remember to ask yourself whenever you are trying to approach an audience with your design that you are not accustom to.
- What is the culture of their region?
- What are influencing factors that shape the society they live in?
- Would it be practical for me to conduct research using a test group?
- Is the outcome of my normal design approach going to bring a result that is offensive to them?
To learn more about how design differ from culture to culture, read:
- Worldwide Graphic Design Part 1, Part 2, and Part 3.
Now let’s dig in to some practical knowledge.
Quick Photoshop Tutorial: Create A HD Television Icon

I don’t think this tutorial and creation will be too difficult for you because I’ve put everything in easy to follow steps and tried to explain the best I could.If you have basic knowledge about Photoshop you should be able to easily keep up and let me guide you through this tutorial! Let’s get our hands dirty
Step 1 – Background
Let’s start by creating the background.
Create a new document ( CTRL+N) and make it 500 by 500 px.
Create a new layer(CTRL+SHIFT+N), fill it with random color and then add a Gradient Overlay like in the screenshot below:
Gradient overlay:
- f6f7f7
- b7b9c5
- f6f7f7


Step 2 – Body
Create a new layer.
Select the rectangle tool and make a shape with it to be something similar like screenshot below (the color doesn’t matter now).

Press “Ctrl + T” or go to Edit>>Free Transform Path to select the transform mode.
A button will appear to switch the transform mode to wrap mode.
Click on it:
Now your selection should have been changed a little bit:
Click hold and drag point 1 to the 2, try to follow screenshots very closely now:
Do the same with the other point:
Once you have done, Hit the Enter button and you should have got something similar to Television screen shape:
Great! Now let’s add these Blending Options:
- Inner Glow
- Gradient Overlay:
- 1b1b1d
- 9lle36
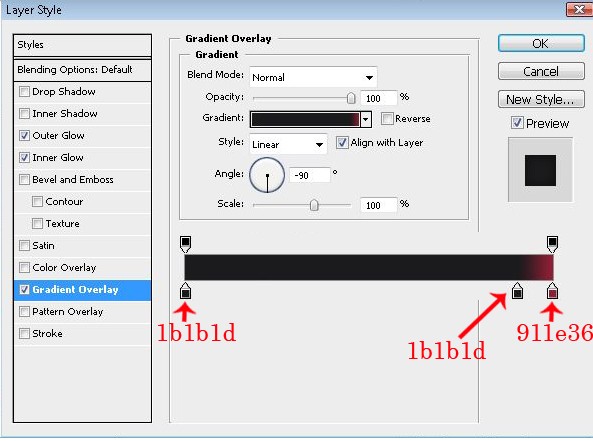
Done? You should get something like this now:

Step 3 – The Display
Create a new layer.
Select your Rectangle Tool (U) again, set it to 2px and create another rectangle like below:

..and add following Blending Options now:
- Bevel And Emboss

- Color Overlay (#161618)
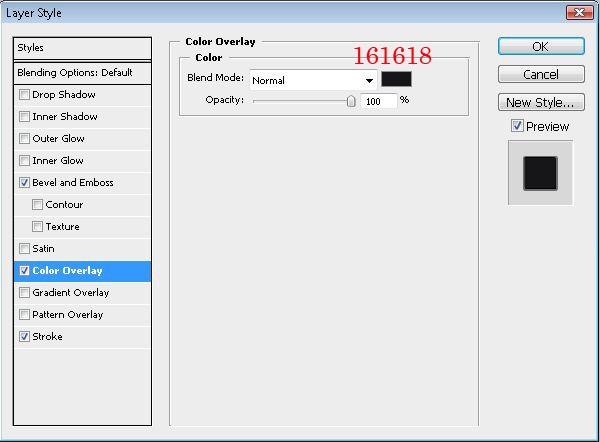
- Stroke (#323232)
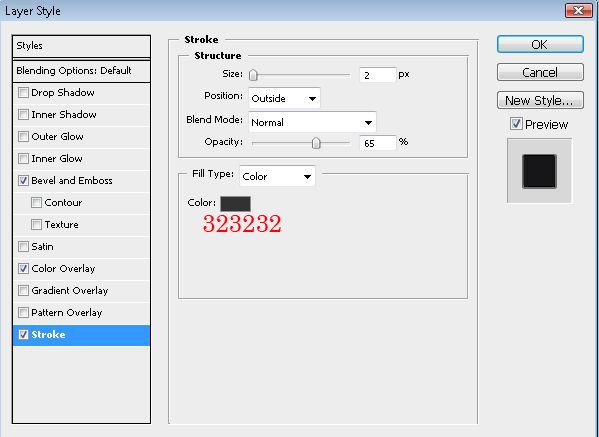
Step 4- The Glass
Create a new layer.
Create a new rectangle but just a little bit bigger than the first one. Make sure it is set to 2px.
..and set it below the first and the second layer. So it should appear like this to get some more 3D in depth look:

Do the same settings as we’ve been done in previous Step 2 :
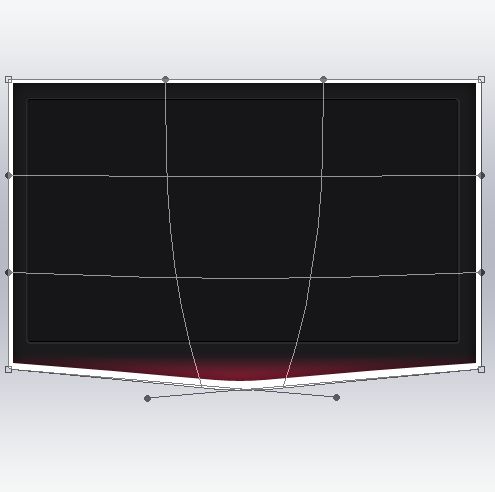
After modifying hit Enter or click OK to approve it:
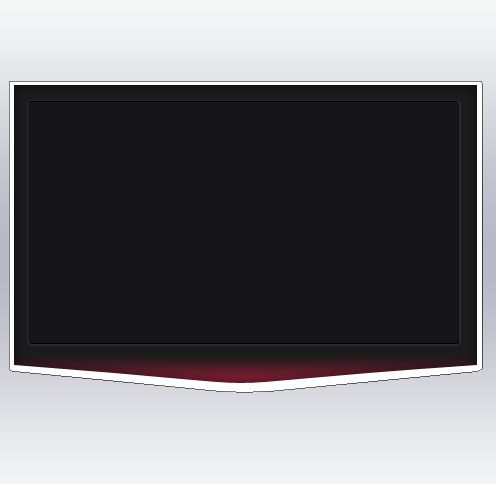
Now add Blending Options (for the first picture you only need to set the Fill Opacity to 0%):
- General blending – Fill Opacity :0%
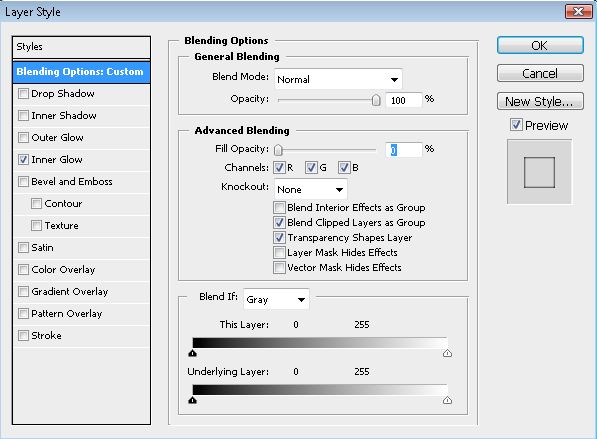
- Inner Glow
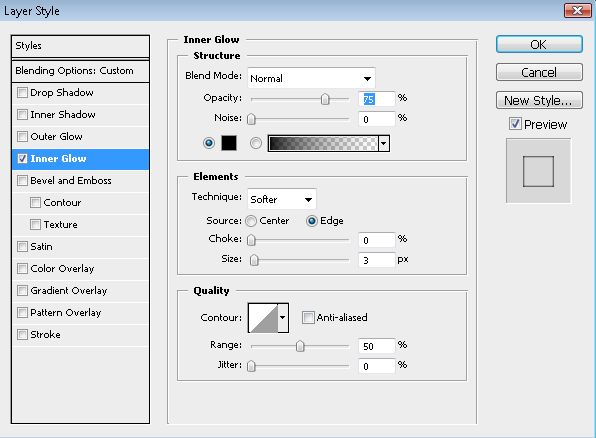
Your outcome should look like this now:
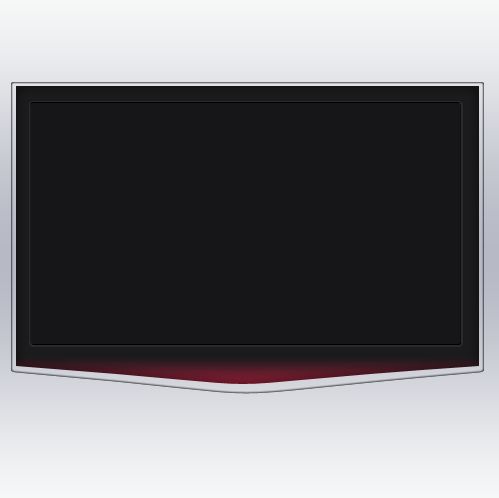
Step 5 – Stem
Okay, now we need stem where monitor will sit on. Let’s do it!
Create a new layer and create something like the selection below using your tool preferred. I used the Polygonal Lasso Tool (L) here:
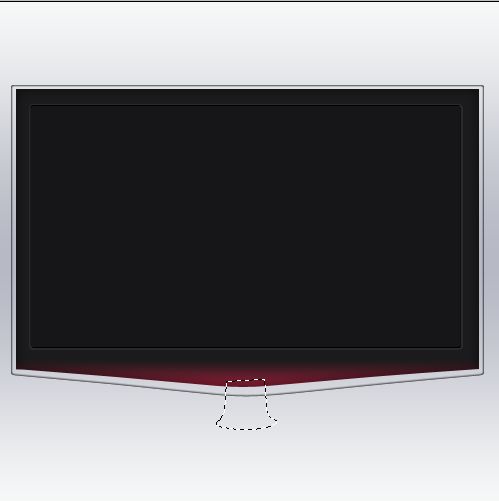
Fill it and add following Blending Options:
- Gradient Overlay:
- 454545
- ffffff
- 454545
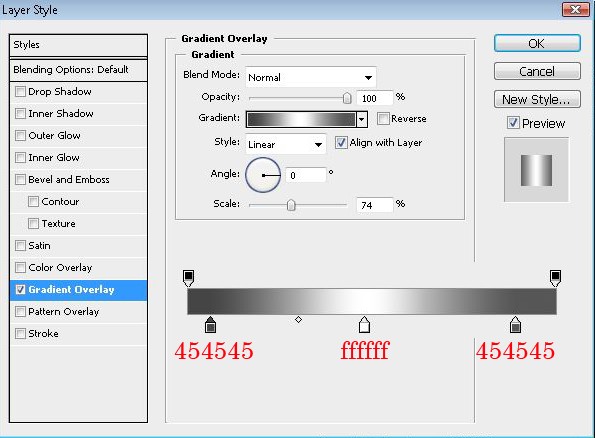
Let’s create a new layer again and make a selection like screenshot below:
(you can do it by ctrl+click on previous layer and then with lasso tool select selection from previous layer selection)
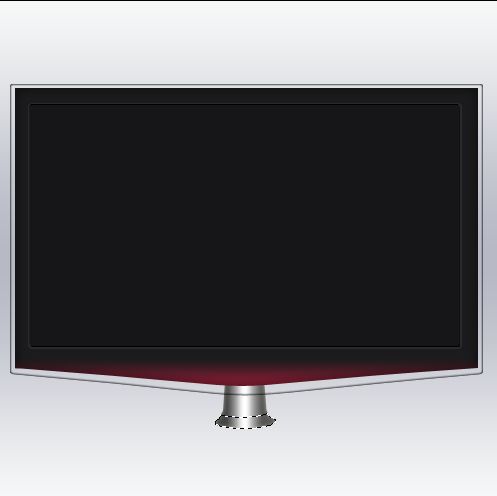
And add these Blending options now:
- Inner Shadow
>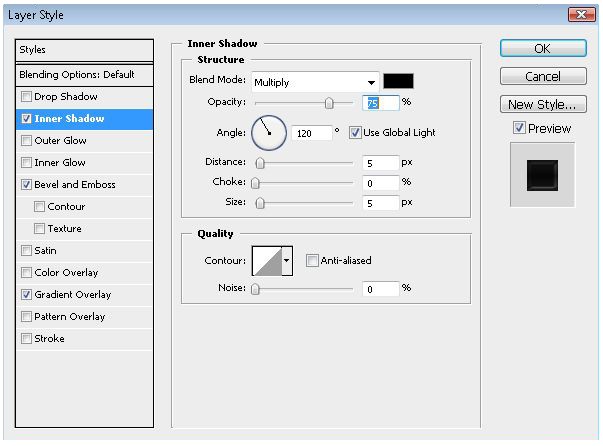
- Bevel And Emboss
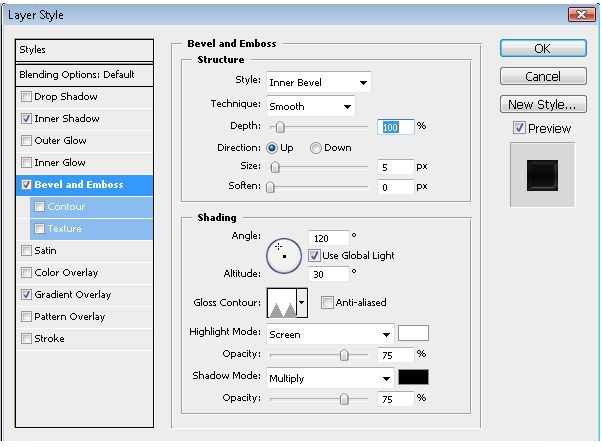
- Gradient Overlay:
- lalala
- 858282
- lalala
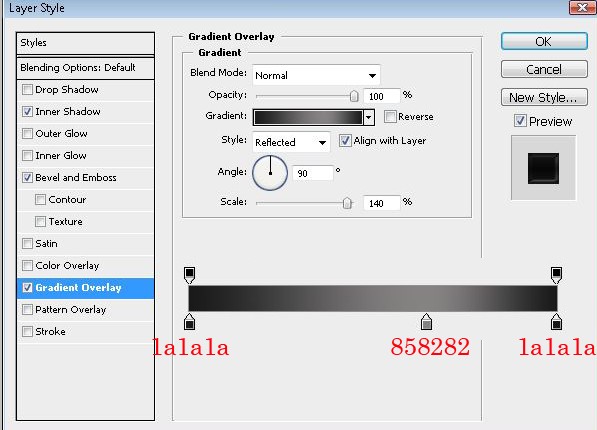
Your result should look like mine:
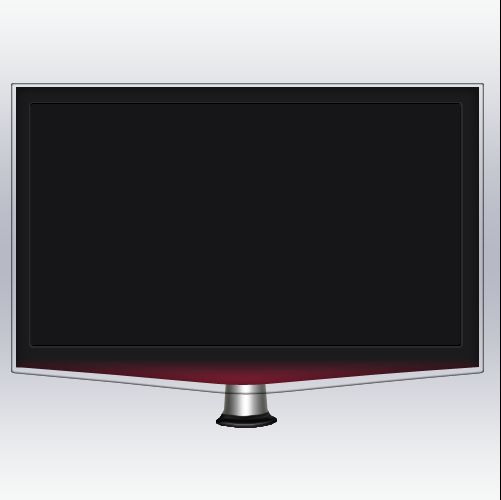
Merge 2 stem layers together now.
Step 6 – The Stand
Okay, let’s create stand now!
Create a new layer and draw a rectangle like screenshot below:

Go to Edit, Transform Path>>Perspective.
Now select the square above the left corner and drag it a little bit to right to create something like screenshot below. When you are finished set it to lie below the stem layer.
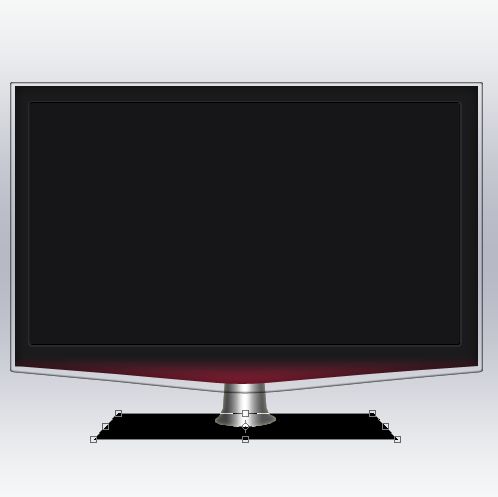
When you are done add following Blending Options:
- Inner Shadow
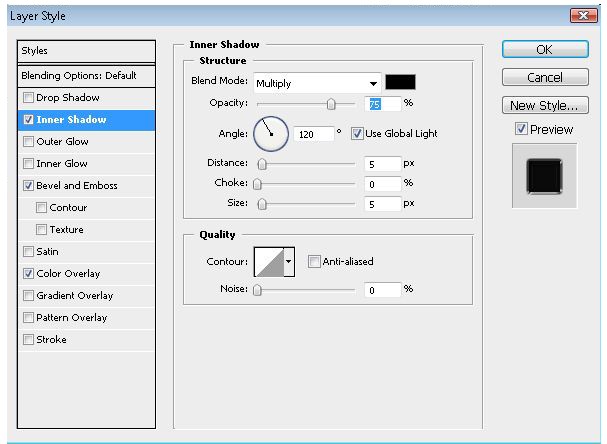
- Bevel and Emboss
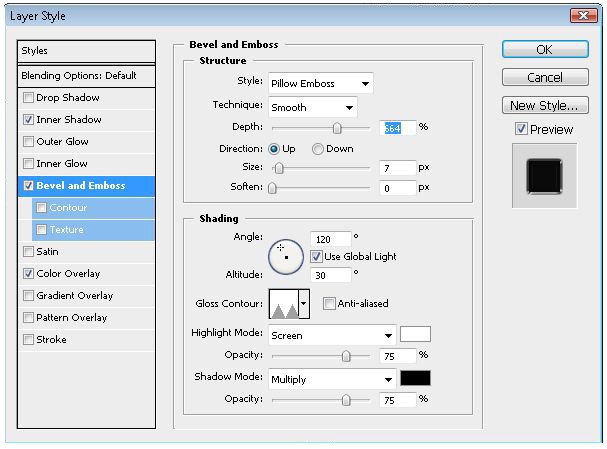
- Color Overlay (just something not so black..make it dark grey)

Step 7 – Reflection
Duplicate the Stem layer, then go to Edit>Transform>Flip vertical and set it below the original stem.
Now create a new layer and brush with a white color on the stand.
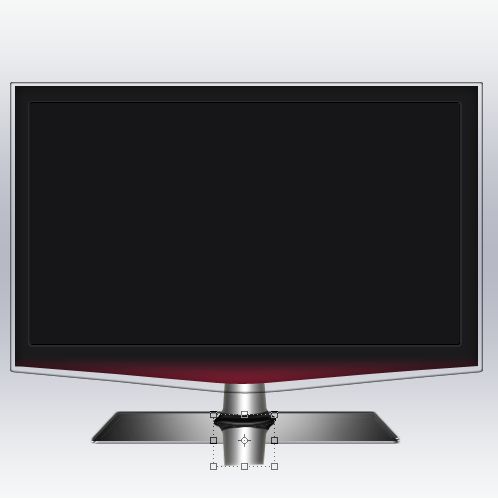
Now erase the parts you don’t need anymore (like the picture below) and bring the Opacity down until it looks realistic:
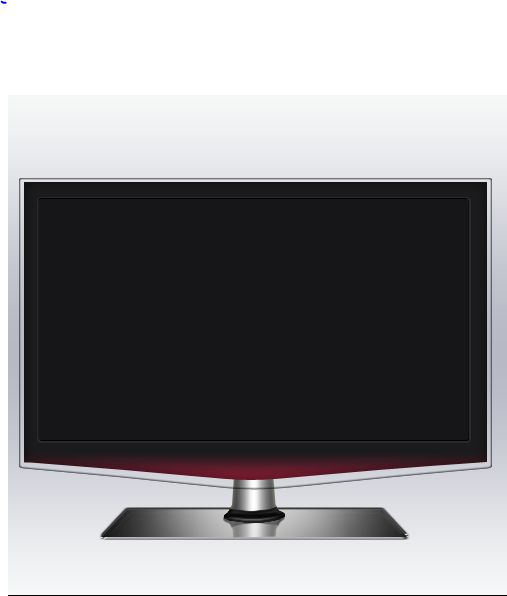
Step 8 – Glow
Create a new layer and create a selection like this with your Polygonal Lasso Tool (L):

Fill it with white color (or use subtle gradient if you prefer it that way):
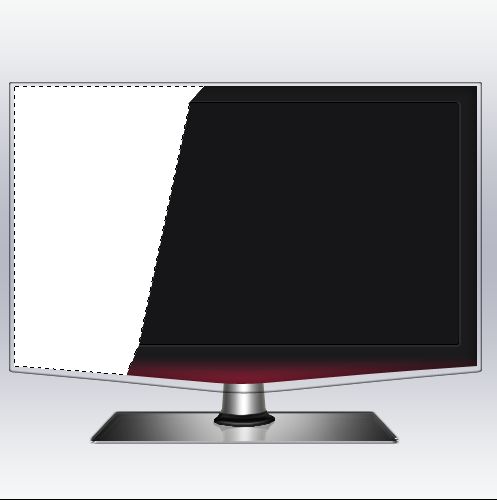
Now just bring the opacity down a little bit as you like to get realistic effect.
Create a new layer and brush with a black color on the left side like I did to give it more 3D look.
I will not go in detail in those small steps,but small tips to finish:
- Create buttons – to do it create a new layer and add some light gray circle with your brush tool like i did and just enable the inner shadow in the Blending Options.
- Add Text – add some text there to make your own LCD brand,just don’t forget to add your text the buttons and the gray line below your text.
You should have your own LCD TV now! Great!
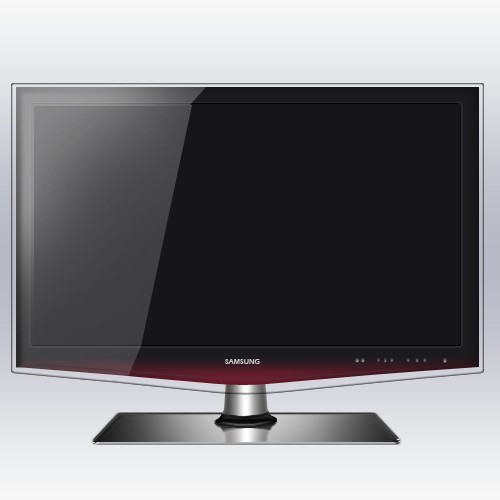
Is it not easy? Add now some cool looking image, portfolio work and put it on your webdesign, be creative!

You can download the Photoshop files here.
In the next section we’ve got some great Macbook widgets.
Designer Toolbox: Top 20 Widgets for Your Macbook
When it comes to the age old Mac-vs-PC argument, among the most innovative features that sets the Macbook apart is the Dashboard. The Dashboard a virtual toolbox where every Mac user can place their tools or weapons of choice. Whatever type of user you are – a designer, writer, businessman or a student – you can benefit greatly from the Dashboard. The Dashboard is essentially a semi-transparent layer that hosts mini-applications called ‘Widgets’.
For the Web Designer
Dashboard widgets are a great help to web designers and web developers for they greatly increase time efficiency and productivity. They make things faster and easier, a kind of ‘cheat sheet’ for the designers.
CSS Cheat Sheet

displays the essentials of CSS coding from the CSS Cheat Sheet.
Loremify

A sleek Lorem Ipsum generator that instantly copies to your clipboard in one click. It has an HTML mode and toggle HTML tags.
HSLider

Awesome widget for the CSS web designer, the HSLider generates the selected color into a CSS–hex, RGB and HSL.
Symbol Caddy

The Symbol Caddy is a useful tool for getting common special characters and HTML codes in a flash. The Keyboard mode copies characters to your clipboard while the HTML mode copies the HTML code. This makes the work process a lot faster.
HTML Tidy Widget

The widget cleans up your HTML code right from your dashboard. Simply enter your HTML code on the space provided, click, and your HTML is tidied up, getting rid of the errors and warnings and turning it into a valid HTML, XHTML or XML code. Pretty awesome tool if you ask me.
For the Businessman
Businessmen are always moving and on the go, thus their Dashboard should be matched by equally fast and informational widgets to aid them in their business.
iStocks

A great widget for businessmen, investors, even speculators, who want to see instant quotes on international stocks, indices and currencies.
Currency Converter

Provides quick calculation of over 200 currencies in the world, even the old currencies like the Italian Lira or the French franc. Very necessary widget especially when doing international business transactions. The widget automatically updates the exchange rate every time the computer connects online.
For the Everyday User
Twidget

The Twidget is everybody’s favorite widget, since everybody now has a Twitter account. It’s fast, it’s reliable and it’s awesome. Plus, it’s free.
Delivery Status

Delivery Status is an all-in-one delivery tracker. Simply key in your tracking number and it will automatically update where your package is and when it’s arriving. Now you’ll never have to check the various websites to track your package again and again. Being an avid online shopper, this is one of my most necessary widgets on my dashboard.
Milk The Cow
Everyone needs to-do lists. Everyone. So, the ‘Milk the Cow’ widget is perfect for adding your tasks and to-dos in one simple Mac widget.

For the Constantly Bored
Pirate Translator
![]()
Translate boring English into Pirate language. It’s a totally nonsense and silly widget, but it’s hilarious.
Scenario Poker

Simply a Texas Hold ’em Poker widget with three rounds and 27 simulated opponents. If you win, you advance to the next round. If you run out of chips, you lose. A great way to keep yourself entertained during lunch breaks.
To finish this article we have some tips from experts on building a multicultural site.
Expert Tips on How to Build a Multicultural Website
 Let’s start with a truism: the web is global. Nothing particularly insightful about that statement, but for anyone undertaking any kind of creative endeavor in cyberspace, the proclamation that the ‘web is global’ should be an unspoken mantra that underpins any design consideration. For web designers, issues such as colour, layout, formatting and navigation are all key considerations throughout the design stage.
Given that the web is indeed global, then anyone from London to Lahore can view your carefully crafted web pages – and if you want to appeal to a global audience, it may be best to design your site so that it’s easier to convert for international visitors.
Arabic, for example, has around 300 million native speakers around the globe, and as an official language in 26 countries (the third most after English and French), it’s clear that Arabic is a language that shouldn’t be ignored for those seeking to make serious inroads into international markets.
Using Unicode
Fancy graphics and cool colour schemes will certainly help sell your site to the masses – but ultimately, the old adage that content is king certainly rings true for most websites.
With that in mind, even if the plan is to build your website in English only, if you design using Unicode from the start, you will be well positioned to adapt your pages for other languages later on. Unicode is the only sensible character-set option that enables websites to support different scripts. UTF-8 is compatible with over 90 written languages (‘scripts’) and has a range of over a hundred thousand different characters.
Importantly, UTF-8 is supported by the most common browsers (Explorer, FireFox etc) and Operating Systems (Windows, Linux, MacOs), whilst the likes of Apple, Microsoft, IBM and other industry lynchpins have all adopted it as a standard.
Even if you don’t plan to use a non-Latin script on your site such as Arabic, the German alphabet, for example, contains an additional four characters: Ä, Ö, Ü and ß. Many other European alphabet systems use even more characters – which is why using Unicode is important.
Green Hats: Cultural and Colour Considerations
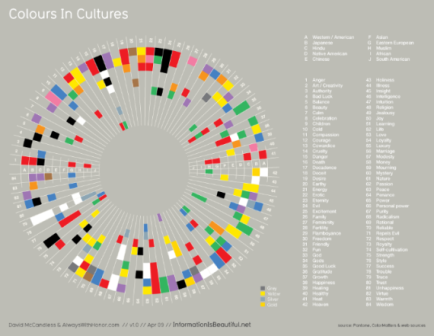
If you are setting up a website primarily to be aimed at audiences in the US or the UK, that’s great. But what if your strategy changes later on? It’s much easier to develop the aesthetics of your site from the start, rather than re-designing it later on.
Clearly, you can’t structure the aesthetics of your website to please everyone. But you can choose a culturally sensitive colour scheme – remember that different colours can mean different things in different cultures.
For example, in the United Arab Emirates and other Arabic cultures, green signifies holiness or luck, whilst blue represents immortality and is deemed a ‘protective’ colour. Orange has religious connotations for Protestants in Northern Ireland, and whatever you do, you might want to avoid placing a green hat anywhere on your website, as this means that a man’s wife has been unfaithful to him in China.
A light-coloured background with dark text is a safe bet across the world – it’s easy to read. Any other graphics, patterns or colour schemes you use should be chosen to reflect any markets you plan to enter: as a general rule of thumb, it’s best to avoid anything that is potentially divisive, such as religious, political or sexual symbols. A picture of a partially clad lady may go down a storm in the West, but in many eastern cultures, a dim view may be taken of this.
Layout & Navigation
Not all languages read from left to right. Arabic is one such language that reads in the opposite direction (right-to-left) and as such, this can throw up some issues when converting your design for specific markets.
If your navigation bar is vertically positioned on the left-hand-side of your English language website, then in Arabic users will obviously have to read from the right to left which means the navigation bar may not appear in your preferred position in relation to the direction the user is reading.
Of course, it’s not the end of the world if you have to shift the navigation bar to the other side of the page for your Arabic site, but for simplicity – and uniformity – you may favour a horizontally positioned navigation bar instead. This means the rest of your design and layout templates can remain the same across all your sites.
Bandwidth Barriers
This may be hard to believe, but not all countries have high-speed broadband internet access yet. Much of South America, Africa and even parts of Asia are still on internet connections that most people in Western countries would deem ‘slow’. With that in mind, you may want to avoid really heavy graphics and bandwidth-sapping Flash animations – it’s unlikely web users will hang around for ten minutes for a picture to load on their screen.
This doesn’t mean you should build text-only websites, but it does mean you should perhaps provide two options for web users: a simple HTML only version and a normal, flashy ‘bells and whistles’ version.
Multilingual SEO
You might have the most beautifully designed website in the world, but if nobody can find it on the World Wide Web, then is there any point in it being there?
Visibility is everything on the internet, which is why search engine optimisation (SEO) plays such a crucial part of any web content strategy. The issue of SEO is probably best left for another article, but for those who already optimise their English language site, it’s worth bearing in mind one golden rule of thumb when optimising your site for international markets: never translate your keywords directly.
If you’re translating your website content yourself or using a translation agency, the keywords for which you rank highly on Google.com or Google.co.uk should be researched for each target country. A translator won’t know what people use to search for products or services locally, they may use synonyms, abbreviations or colloquialisms.
And there you have it…the basics of multicultural web design!
This post may contain affiliate links. See our disclosure about affiliate links here.