Jetpack is a complete toolbox full of mini-plugins. If you are in need of installing 30 separate plugins, you would have to find and install each one of them.
But Jetpack gives you all of those features in just a single plugin. Today, you will learn what the Jetpack plugin is all about and how can you use it on your site, and help you decide which modules you need for your WordPress site.
Jetpack Plugin Features
Website Stats

Website stats measure the behavior of visitors and track the details of your website. Jetpack has extremely concise stats with no additional load on your server. It provides information such as Referrers, Top Posts and Pages, Search Engine terms, Subscriptions, and Clicks.
Comments

WordPress users often search for a plugin to improve the comments and make it easy for people to subscribe posts or blog. With Jetpack, your visitors can write comments and even have several ways to identify themselves. Your visitors can leave a comment as guests, or they can choose to use their accounts.
Sharing Made Simple

JetPack allows you to easily incorporate social media sharing buttons. Just drag and drop from the given list of most relevant social networking sites available. You can also use different options to customize such as using a Facebook share button rather than using the Facebook Like button and so on.
Spelling and Grammar

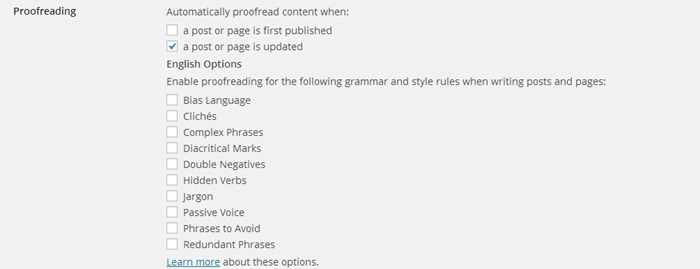
This can be a huge benefit to your site. Jetpack helps you avoid grammar errors and spelling mistakes that can be sometimes embarrassing. Once you have finished writing your post, you only have to hit the ‘ABC’ button for a full review of your post.
If you host your WordPress-powered site and want to take advantage of these awesome features that JetPack provides, here is how you can install and activate this plugin.
How to get the Jetpack Plugin?
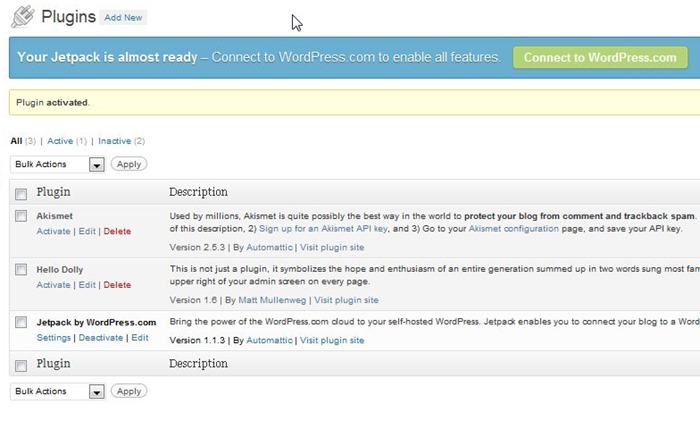
Majority of hosting companies install Jetpack with the 1-click WordPress Install. If your WordPress site didn’t come with an already installed Jetpack, you can get the plugin from here. After downloading the plugin on your computer, go to Plugins > Add New.
Click the button ‘Add New’ and upload the file that you downloaded on your computer. Once you click the ‘Activate’ button, it will set up with WordPress yet will not be fully activated. This is because you need to connect Jetpack with WordPress.com to get authorized.

Activating the Jetpack Plugin
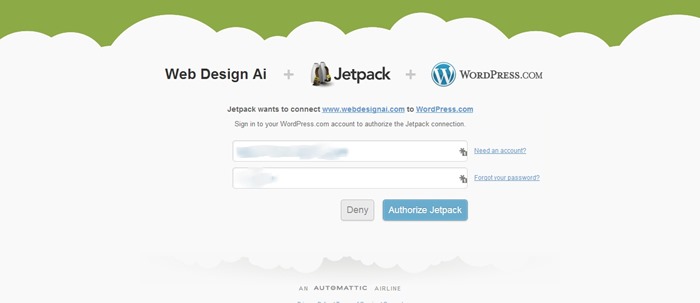
For activating the Jetpack plugin, you will need to connect it to your WordPress.com account. If you are using the WordPress.org for your site, you will still need an account with WordPress.com. But don’t worry because it’s possible to get an account without using the blog service.
When you go to WordPress.com for creating your account, remember to specify that you only need a username and not a blog. Once you have created the account, just click on the Jetpack plugin on your WordPress dashboard. Your Jetpack plugin is now fully activated on your site.

Configuring the Modules
Once you activate the Jetpack plugin, most of the modules will be automatically turned on. However, you can have the option to only turn on the most useful ones. This will help your site to keep up with the speed and loading time. For configuring the modules, click the Jetpack on your dashboard.
Next, click the settings and uncheck the ones that you want to deactivate on your site. Once done, you can simply hit the ‘Apply’ button.
But, which module should you consider? And why should you consider it? Find out:
Which modules and why do you need them?
There are more than 30 features or modules to choose from. By clicking on title of each one, you will get a brief description of what that feature does. These are the recommended ones:
Carousel

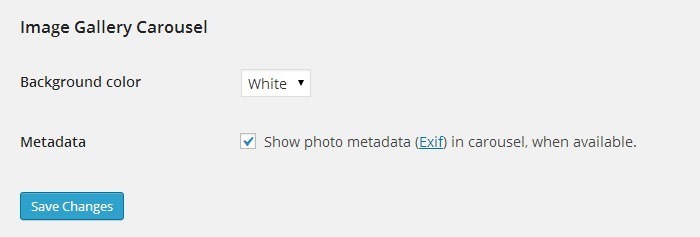
This module will turn your WordPress image gallery into an easy scroll in a carousel mode when users will click on your photos. If you don’t have a carousel turned on, all images that user click on will open in a new page, which can be annoying.
Contact Form

This module enables a simple and easy to use contact form that you can also edit. Click on the button ‘Add Contact Form’ and you can edit the fields, and then insert the form in your post or page.
Extra Sidebar Widget
This module will allow you to add widgets to your sidebar without changing any code. If you want to add an image to your sidebar, you only need to drag and drop. It allows you to display galleries, top posts, Twitter timelines and more.
Subscriptions

This option provides a simple way to enable email notifications of new posts and comments to the readers of your site. Your readers can manage the frequency for receiving new posts through email, and also follow any discussion.
Sidebar Visibility
This is one of my favorite features! If you have a crowded sidebar, this module will write rules for each widget. This way, you can have specific posts appear on specific pages and will not appear on others.
Shortcodes

This module allows you to write some simple codes for embedding other media on your site or blog. If you want to embed YouTube, rather than writing the code, you can simply use the following code:
[youtube=video-URL]
Mobile Theme
With this module, you can enhance user experience by customizing your mobile website and making your site load fast.
Photon
This module is great for speeding up your blog. All your images are uploaded to content delivery network (CDN) hosted by WordPress. This means that the browser can download more images at a single time, which results in a faster page load.
Publicize

This feature makes it easy to share your site’s posts on different social media networks automatically when you publish a new post. If you don’t want to include any of the social networking sites for your post, you can uncheck from the Publicize edit link.
Infinite Scroll
Instead of having to click a link to get on next set of posts, Infinite Scroll pulls the next posts automatically when the reader reaches the bottom of page.
How much does it cost?
The cost to using all these features is absolutely free! However, according to the website, some of the individual Jetpack features may require payment in the coming future. But, you will be notified in advance about anything.
The Good
- JetPack gives you quick and easy access to excess of features at one place.
- Transitioning from WordPress.com to self-hosted WordPress is very smooth and improves your new site’s look and feel.
- It has excellent anti-spam protection.
- Perfect for personal bloggers whose needs are lightweight and not specialized.
The Bad
- Some of the features require a manual activation while some of the widgets are auto activated, which can be little annoying.
- Jetpack is a single plugin which has multiple plugins within, therefore, the more plugins you use, the slower your site becomes.
Why Do I recommend the Jetpack plugin?
There are plenty of WordPress plugins available on the Internet that it can sometimes become hard to choose. Jetpack has a collection of exciting features, that are all part of the same plugin, so you can be assured that they will work together.
Jetpack was developed by the Automatic, the same company behind WordPress.com, and they are also big contributors to the WordPress software. The coding is done with high quality and according to the needs of WordPress users.
Above all, the support provided is exceptional from the community support forum and through the official support channel. If you ask me to use Jetpack or not, my vote is YES!
Jetpack is useful for both experts and beginners because of its simplicity-based principle. It has a significant value when you consider how much it would cost to install all the features alone. With all these features, I would recommend that you try it on your site.
This post may contain affiliate links. See our disclosure about affiliate links here.


